How to Fix a Water-Damaged Ceiling Like a Pro

Water-damaged ceilings are a very common problem. But they are also serious. A small water spot today can turn into a big mess tomorrow. If you act fast, you can save a lot of money and avoid mold or structural damage.


In this guide, we’ll walk you through everything, showing you how to spot early signs of water damage on the ceiling. We’ll teach you how to do a temporary fix for a leaking ceiling if needed. Even, you’ll learn how to fix a water-damaged ceiling completely.


And we’ll also tell you when to call a professional. Here’s the brief for you, though: To fix a water-damaged ceiling, first stop the leak and dry the area completely. Then cut out damaged parts, patch or replace them, and repaint the ceiling nicely.


No more delays. Let’s get into the details.

Signs of a Water-Damaged Ceiling

Signs of a Water-Damaged Ceiling

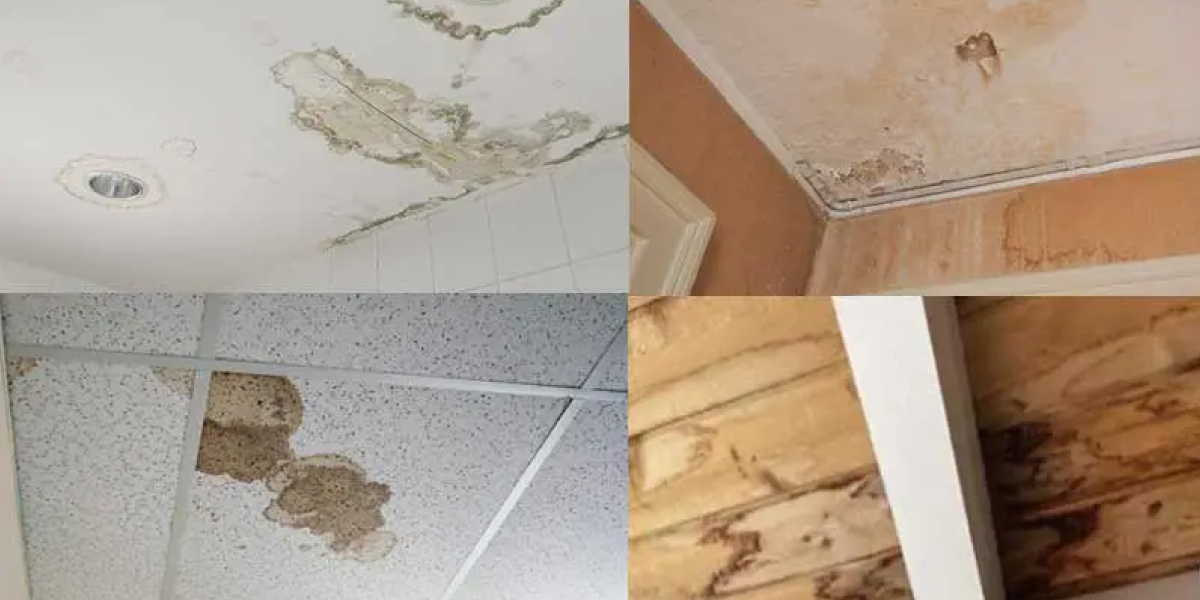
Early signs of water damage on the ceiling are easy to miss. But spotting them early saves you from big repairs later.


Here are the first things you might notice:


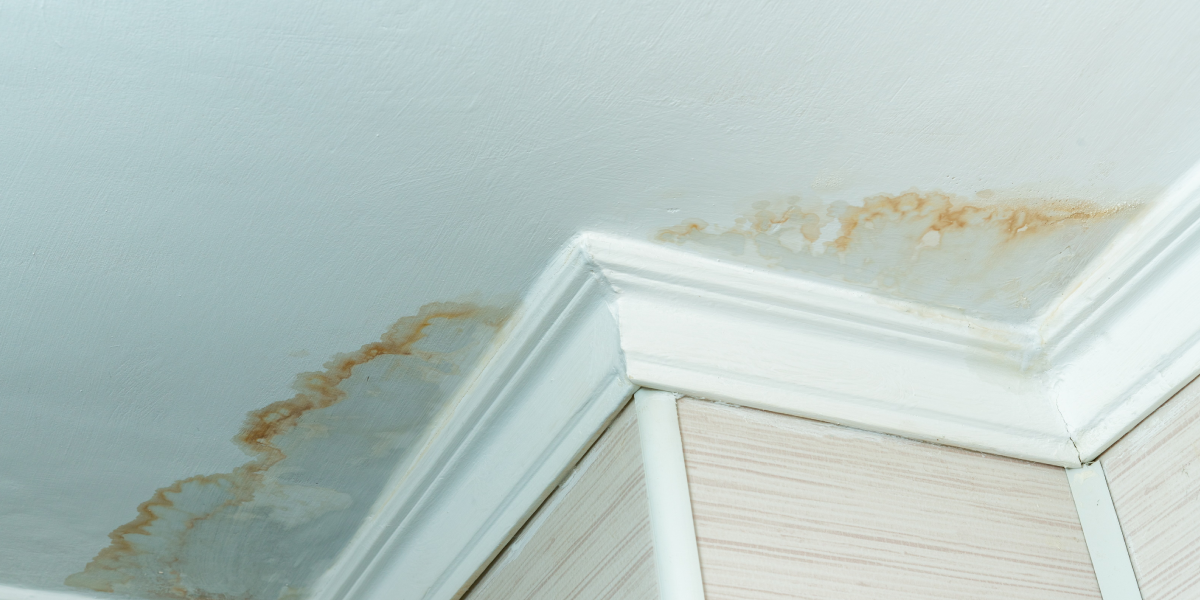
  • Yellow, brown, or copper-colored stains


  • Bubbling, peeling, or cracking paint


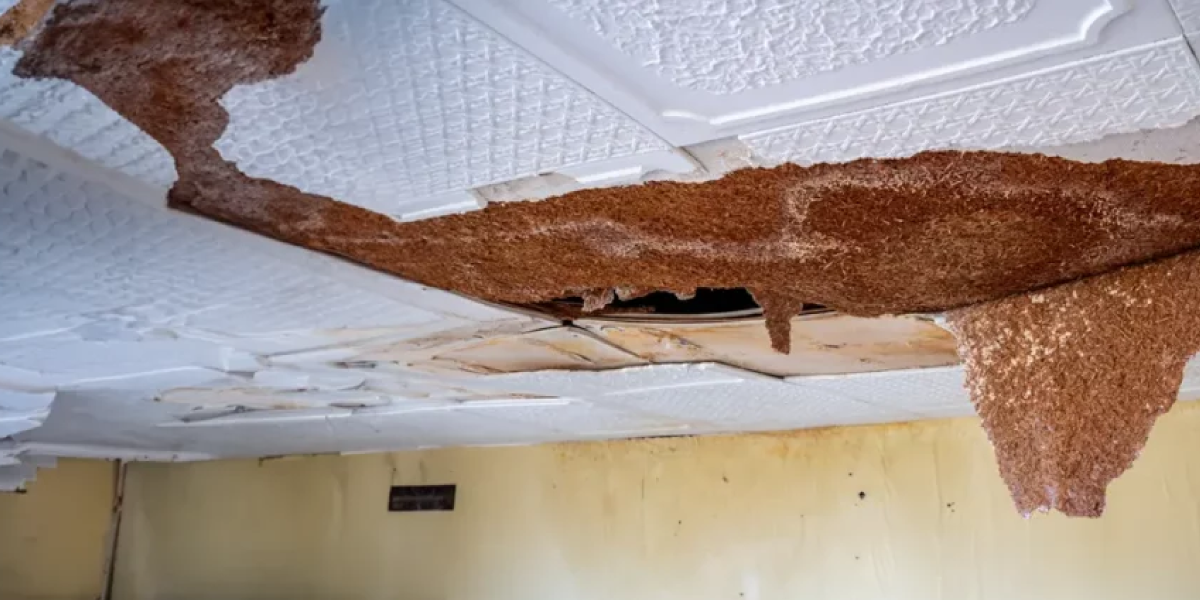
  • Parts of the ceiling are sagging or drooping


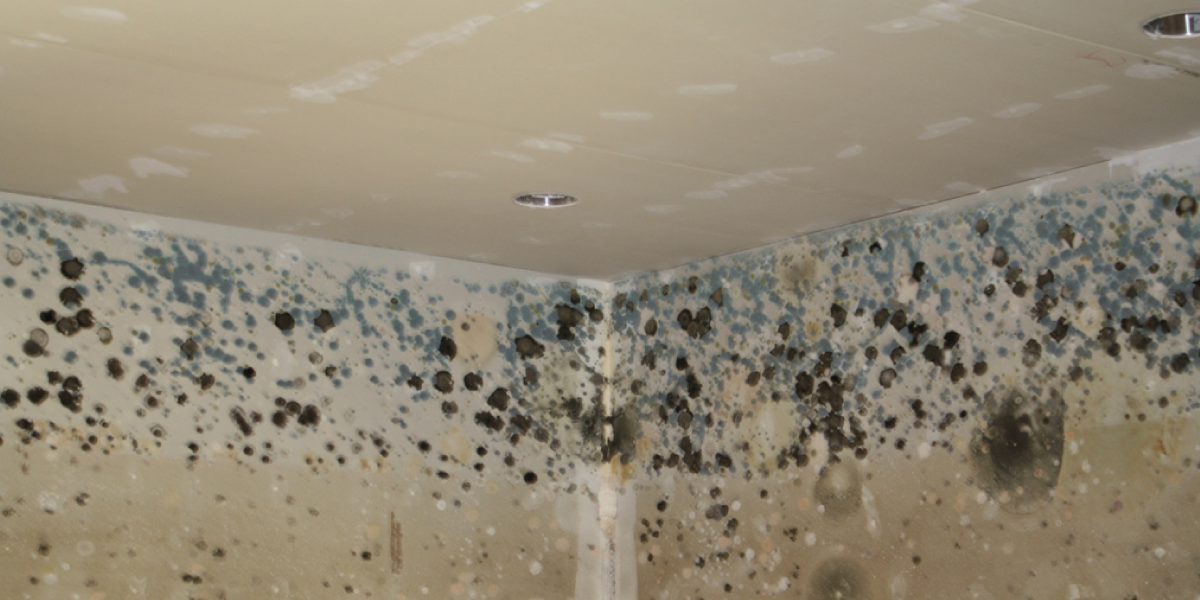
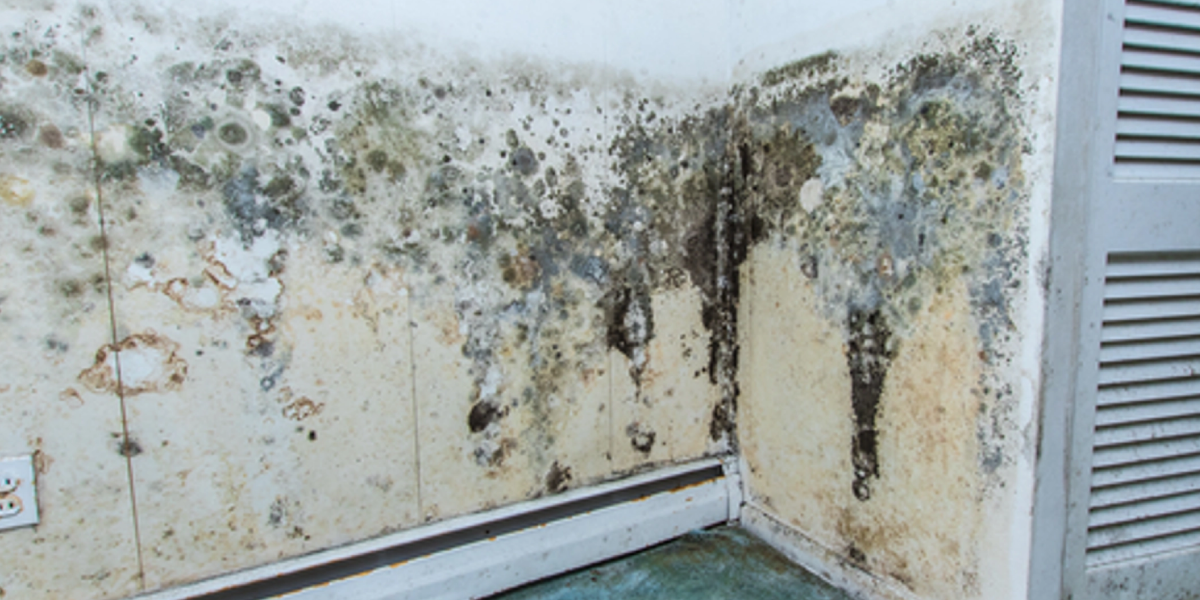
  • A musty smell like mold or mildew


  • Water dripping or wet spots


  • Small cracks are spreading from one place.

Common Causes of Water Damage in Ceilings

Finding the cause helps you know if you need a temporary fix for a leaking ceiling or a full repair. Let’s find out:


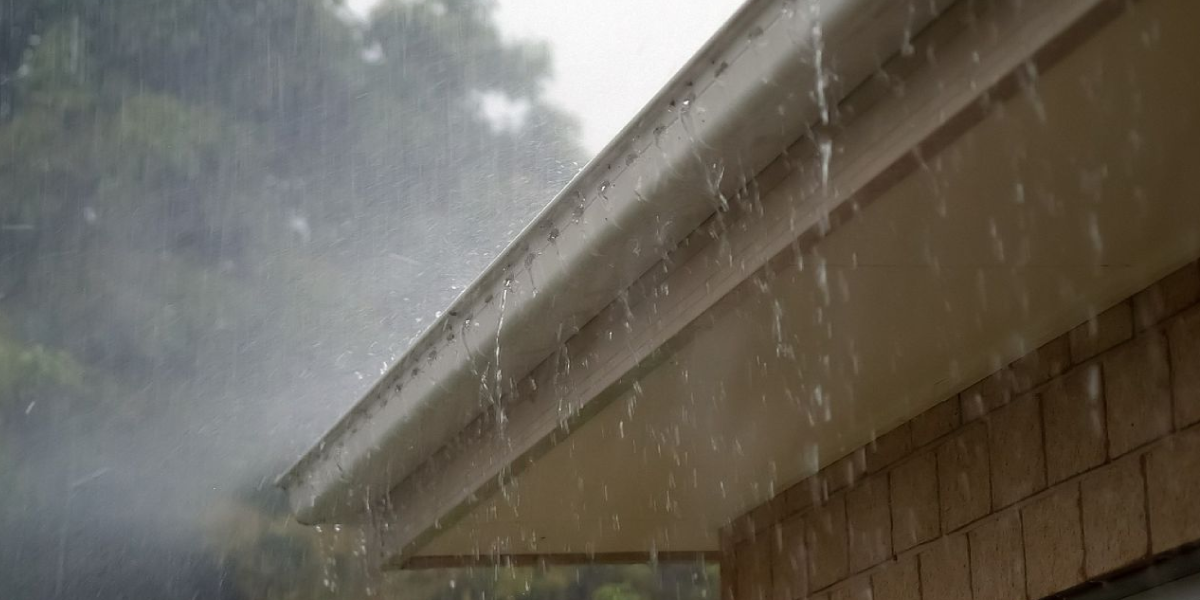
  1. Roof leaks. Broken shingles or flashing can let rain in.


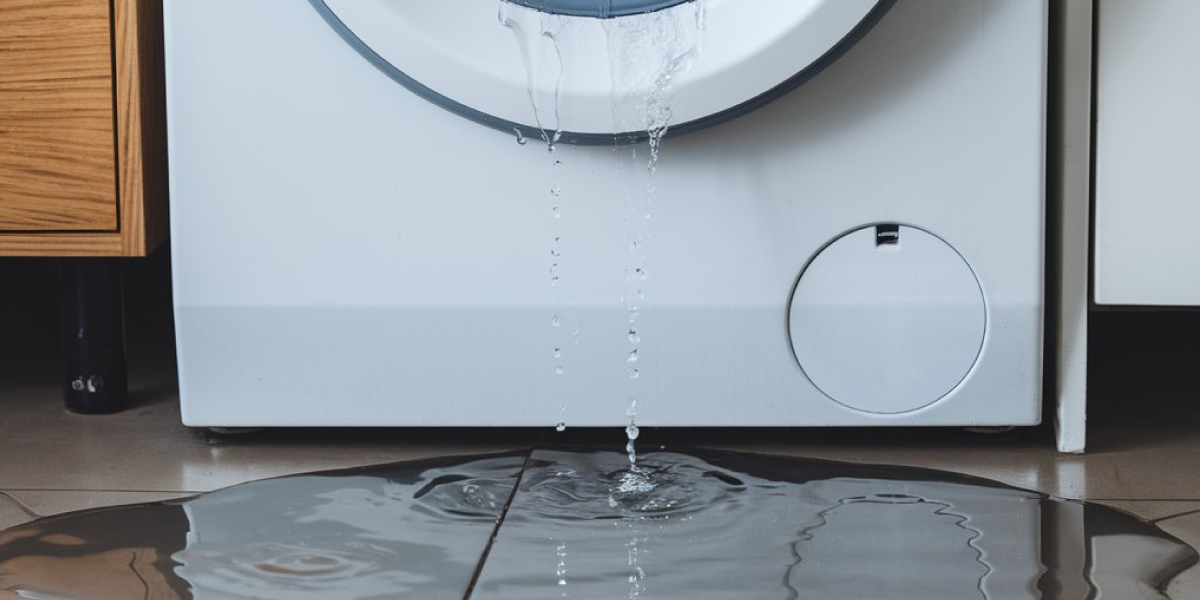
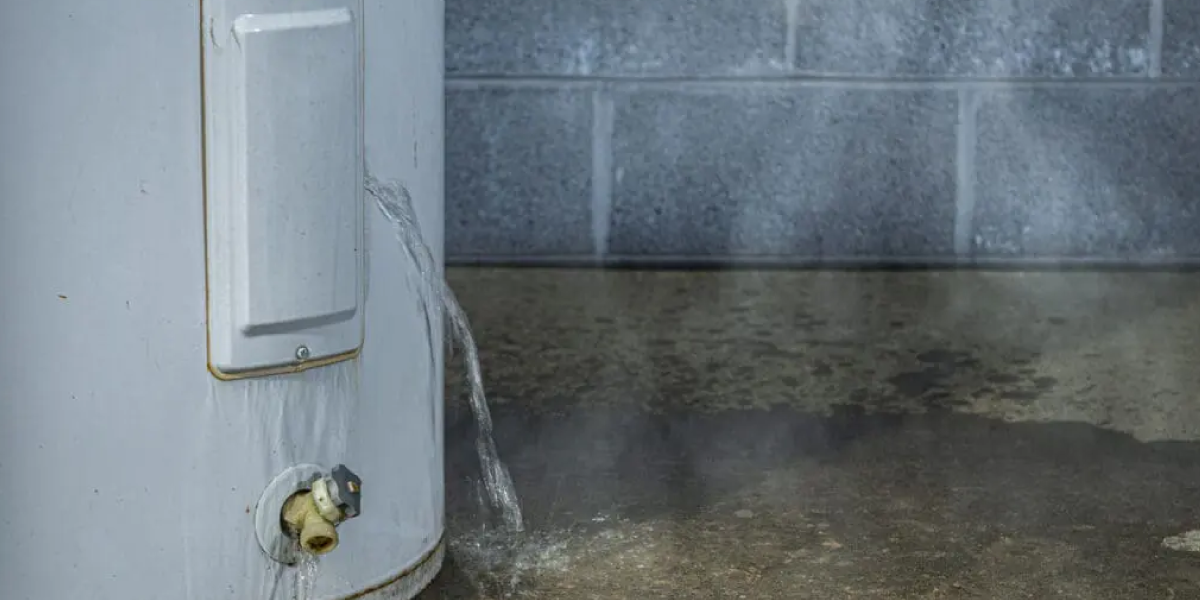
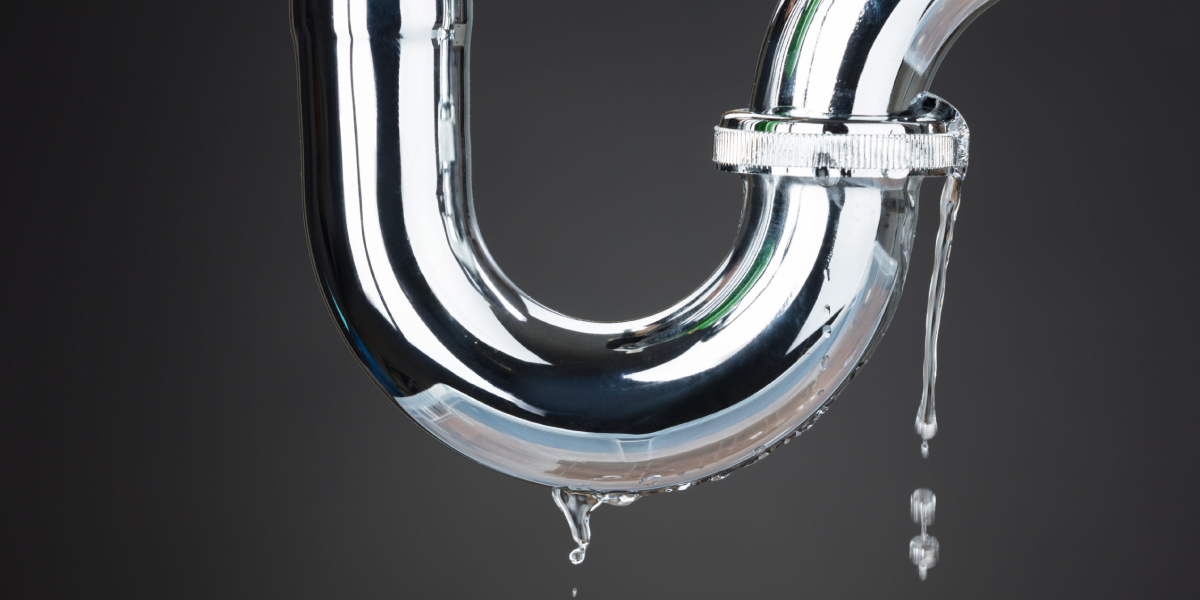
  1. Plumbing leaks. Pipes between floors or bathrooms can leak.


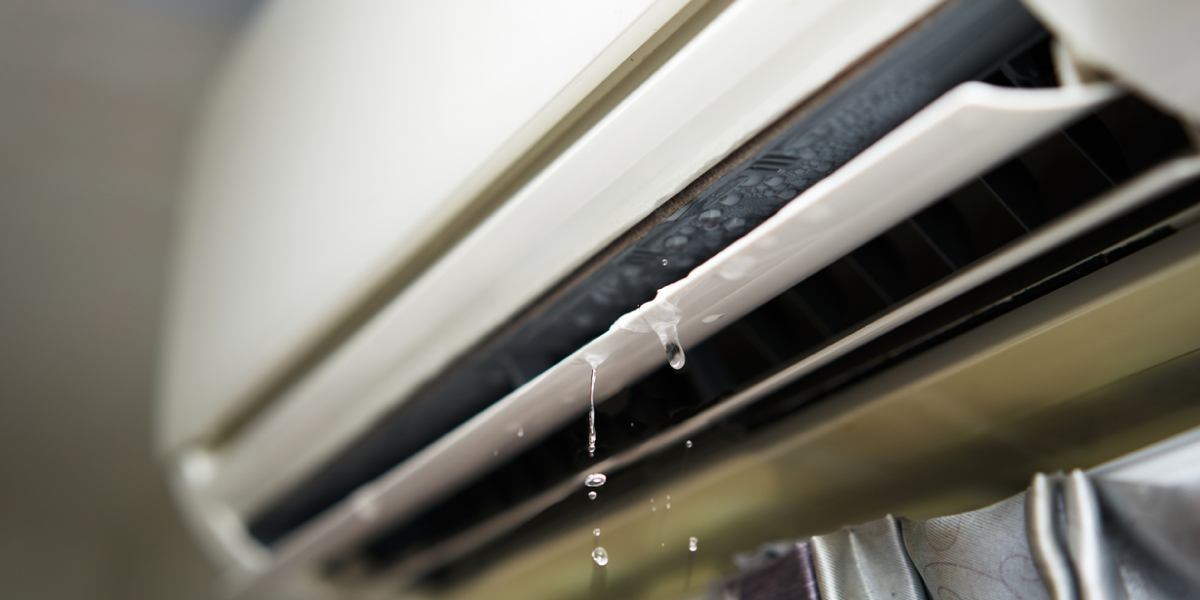
  1. HVAC problems. Air conditioners or ducts can drip water.


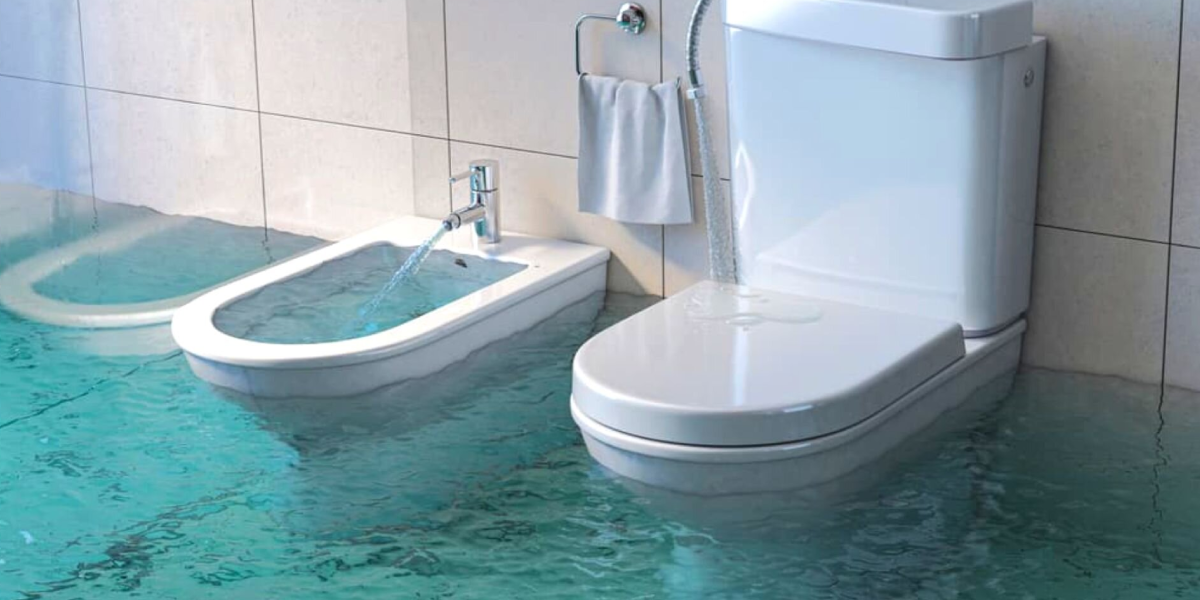
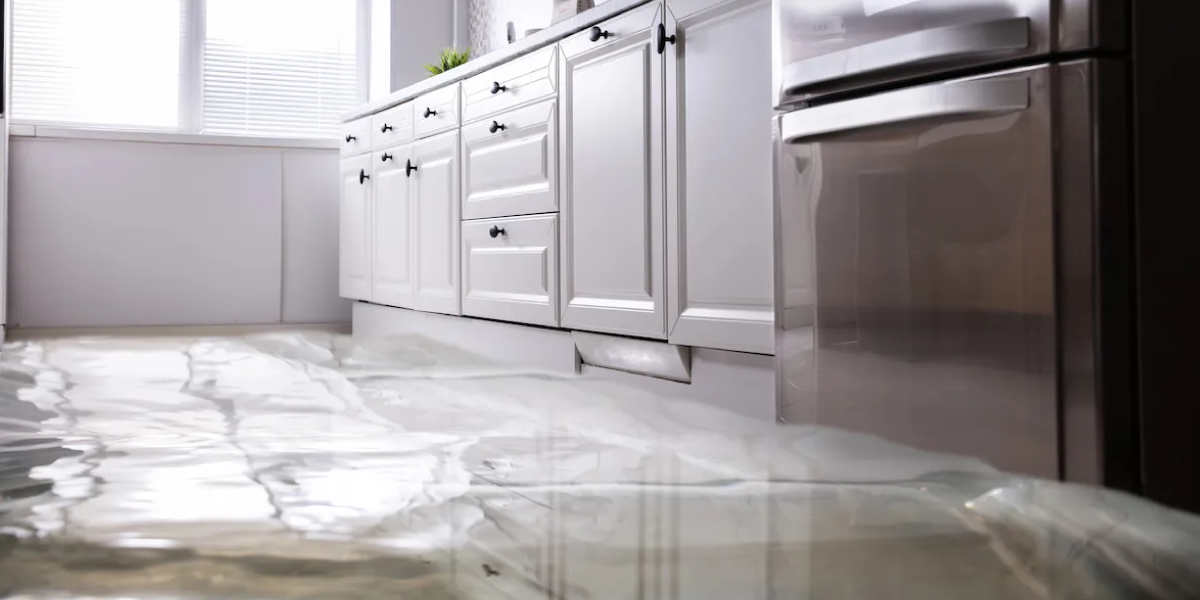
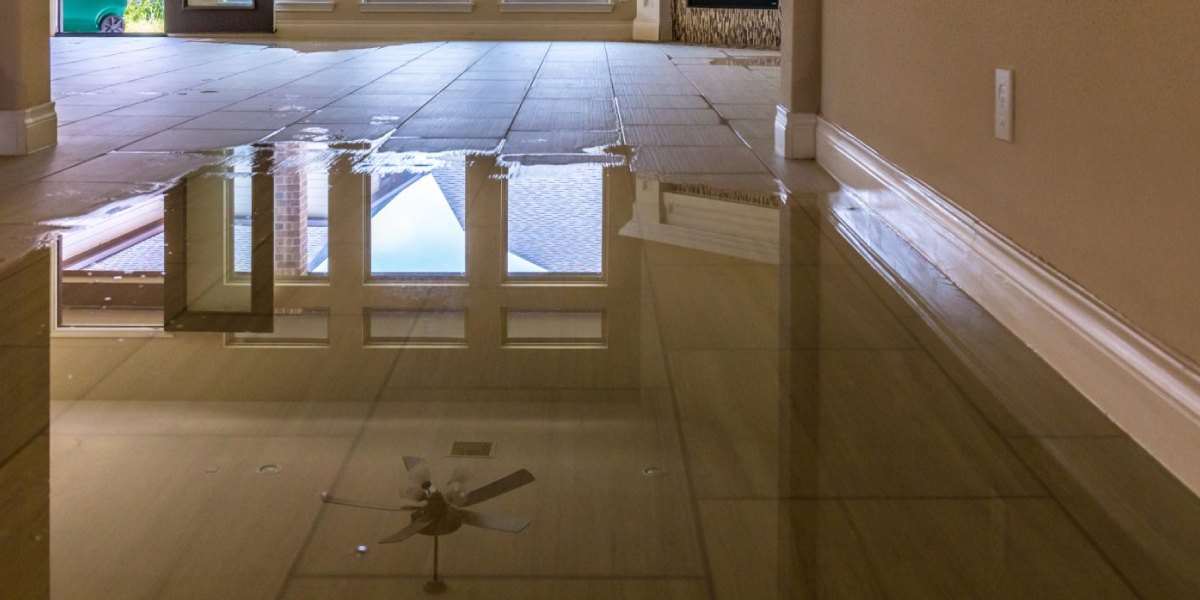
  1. Upstairs flooding. A tub overflow upstairs can soak the ceiling below.


  1. Bad ventilation. Too much steam in bathrooms can cause water to build up.

Important First Steps Before Fixing

Before you jump into fixing the ceiling, there are a few important steps you need to take first to make sure everything is safe and ready.


First, find where the water is coming from by checking the roof, pipes, or any condensation buildup. Then you need to stop the water — if it is a leaking pipe, turn off the water supply, and if it is raining through the roof, cover it with a tarp. 


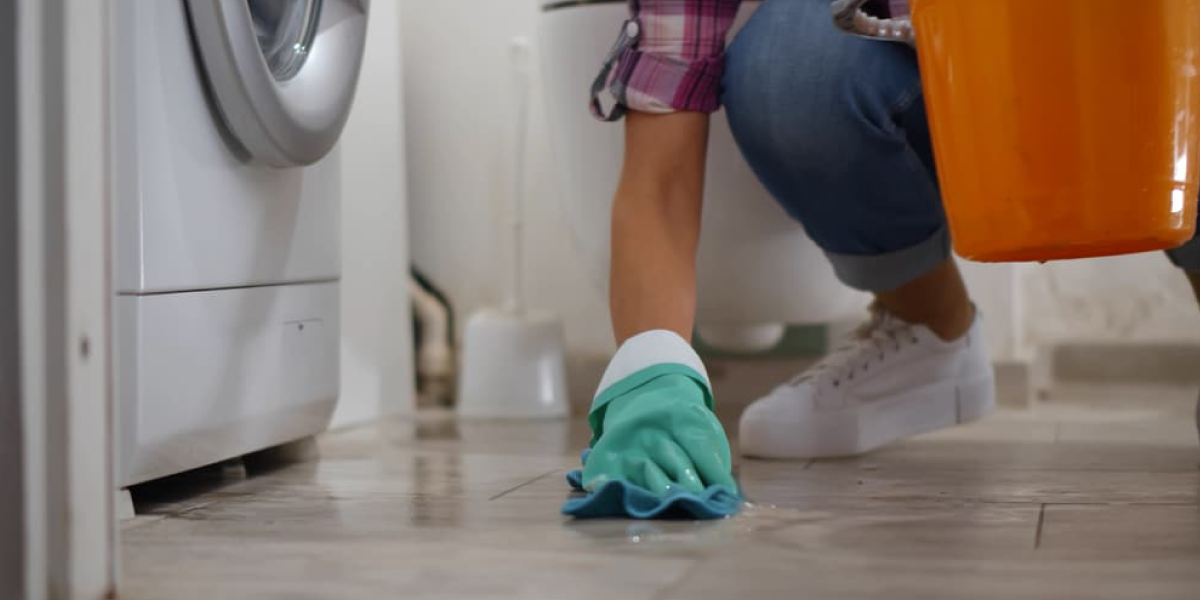
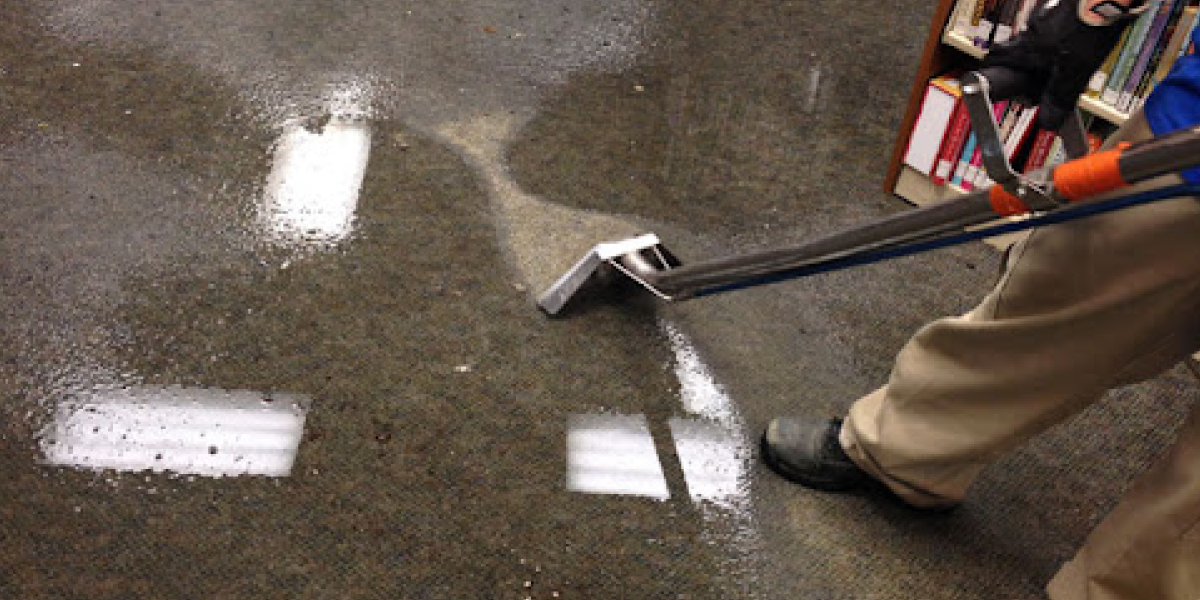
If you cannot fix it right away, you can use a temporary fix for a leaking ceiling just to hold things for now. After that, dry the area completely by opening windows, using fans, or setting up a dehumidifier. 


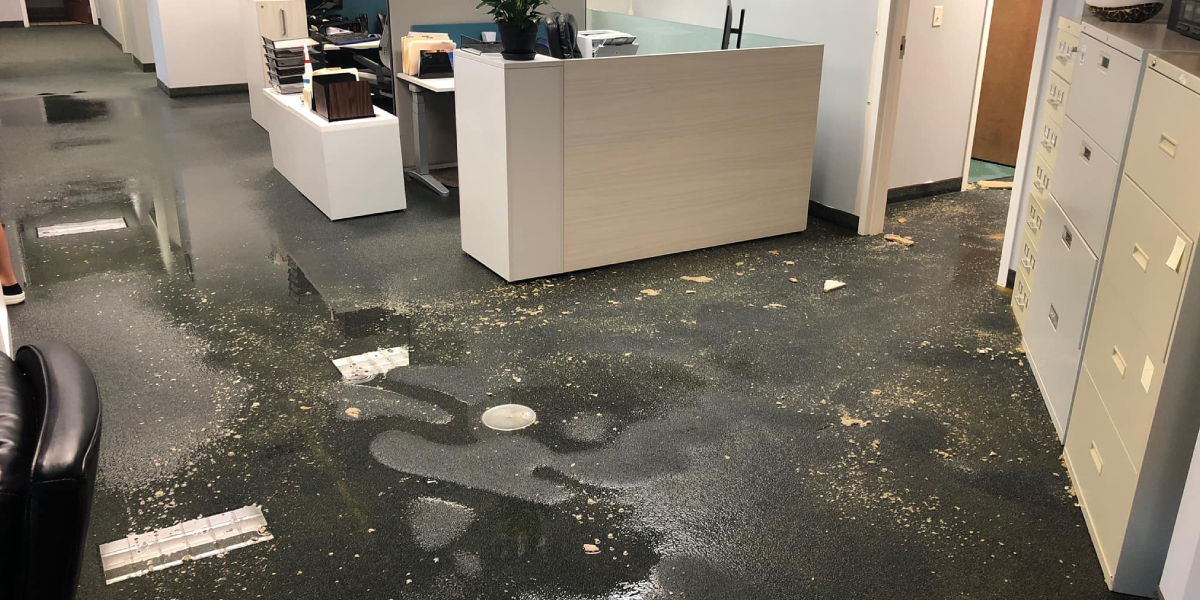
Make sure it is fully dry before you move on. Now check how bad the damage is — is it just a stain, or is the ceiling sagging or falling apart? Remember, water damage on the ceiling is dangerous because if you ignore it, it can cause mold to grow and even weaken the structure of your home.

Safety Precautions Before Repair


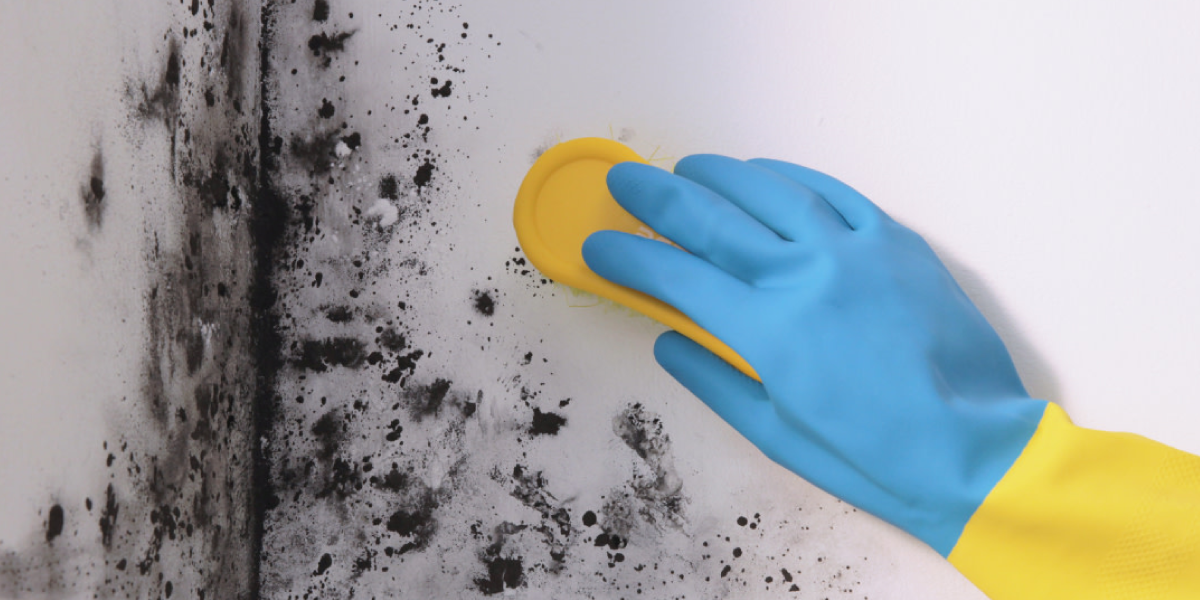
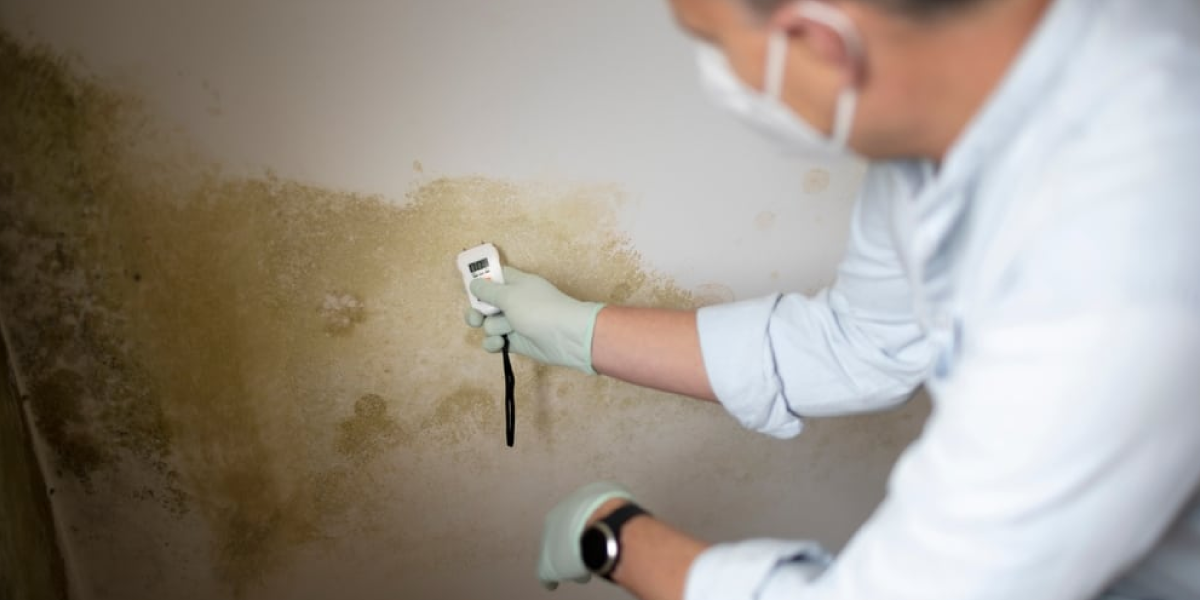
  • Look for mold: If you see a lot (more than a 10 square foot area), call a mold specialist. They know who to call for water damage in the ceiling properly.


  • Turn off the electricity: Water and electric wires are a deadly mix.


  • Wear safety gear: Use gloves, goggles, and a mask when cutting or sanding.

Tools and Materials You Will Need


Tools Materials
Ladder Drop cloths or plastic sheets
Utility knife Joint compound
Drywall saw Drywall tape
Putty knife Replacement drywall (if needed)
Sandpaper Stain-blocking primer
Paintbrushes and roller Ceiling paint
Stud finder (optional) Mold treatment spray

Step-by-Step Guide on How to Fix a Water-Damaged Ceiling

Now, let’s move on to the repair process.


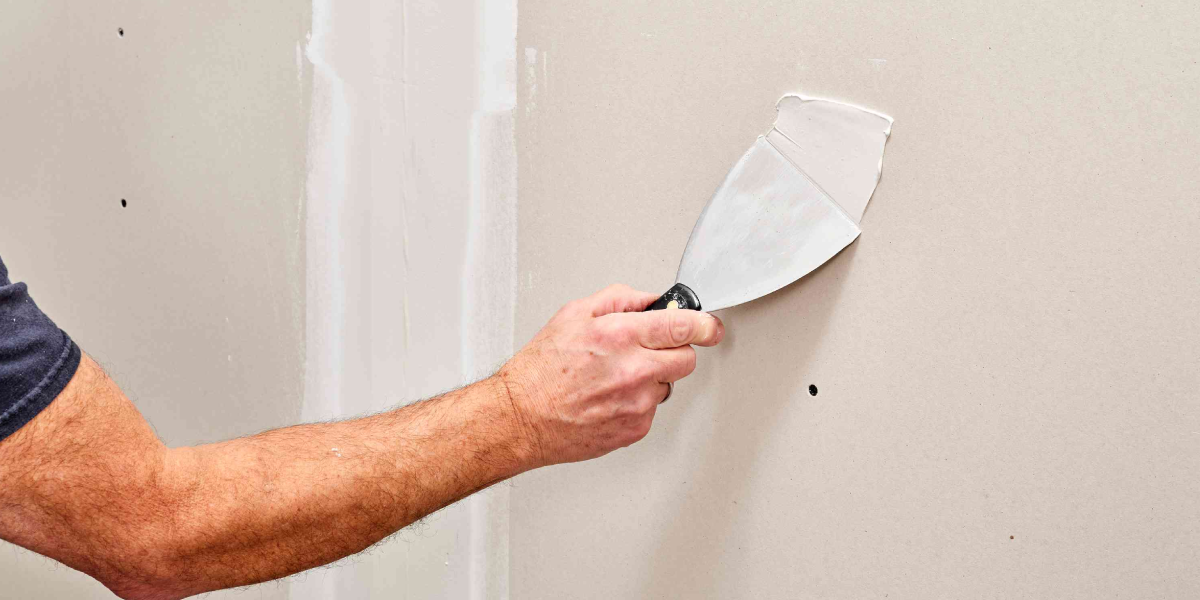
Step 1: Remove the Damaged Material

Remove the Damaged Material

First, you need to remove the damaged material. 


Grab a utility knife and carefully cut out any wet or sagging drywall. If you see loose paint or broken plaster, peel that off too. Just be really careful if parts of the ceiling are hanging down; you do not want anything falling on you. 


Step 2: Dry and Treat the Area

Dry and Treat the Area

Next, dry and treat the area. You want to make sure that the inside of the ceiling and the surface are completely dry before you do anything else. Use fans, open the windows, or bring in a dehumidifier if you have one. Once it is fully dry, spray a mold-resistant treatment on the area just to be safe. This will help stop any mold from growing later on.


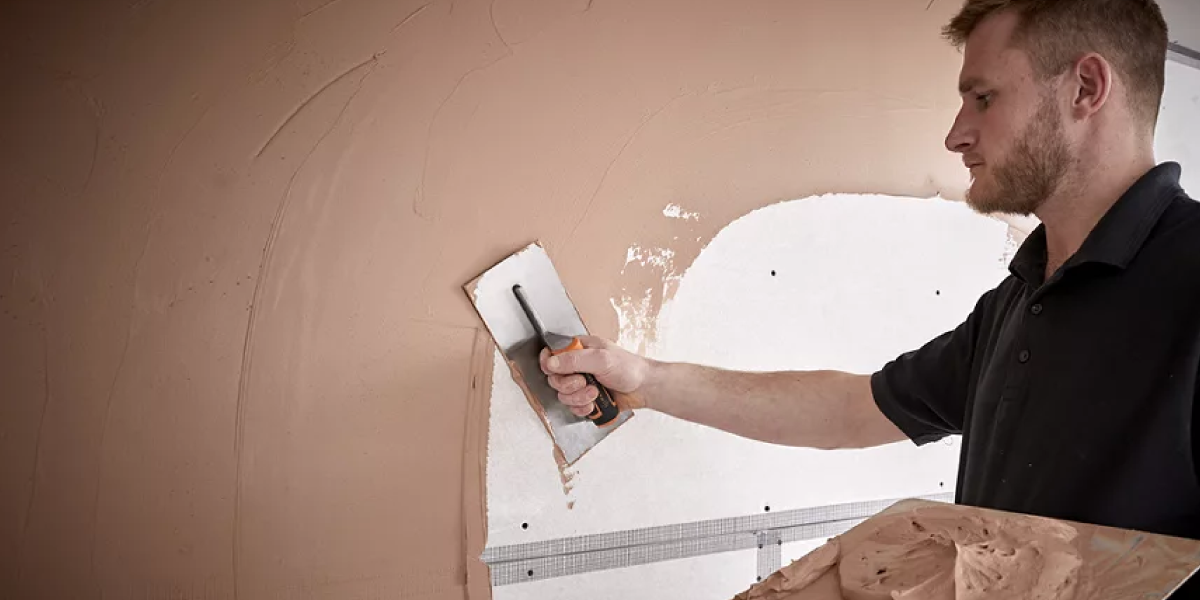
Step 3: Repair the Ceiling

Repair the Ceiling

Now it is time to repair the ceiling. If the damage is minor and it is only a stain, you can simply apply a stain-blocking primer first and then repaint the ceiling using good ceiling paint. 


If the damage is moderate, like small cracks or peeling spots, patch the small holes with joint compound. Let it dry fully, sand it nice and smooth, then prime and repaint the area. 


If the damage is severe, like if part of the ceiling is sagging or collapsed, you will have to cut out the damaged drywall, screw a new drywall piece into the ceiling joists, tape the seams with drywall tape, cover everything with joint compound, and once it dries, sand it smooth. 


After that, prime and repaint the full repaired area.


When tackling water damage, it’s easy to make mistakes. To avoid them, check out our blog on Water Damage Restoration Mistakes.

Painting the Ceiling Properly

When it comes to painting the ceiling properly, always start with a stain-blocking primer. It is important because it stops old stains from bleeding through the new paint. Then match the new paint with the old ceiling color as best as you can.


When you are painting the edges, use a feathering technique where you lightly brush outwards so the new paint blends into the old paint without showing a hard line.

Tips for a Perfect Finish


  1. Sand lightly between coats of joint compound.


  1. Apply 2 or 3 thin layers of paint. Never one heavy coat.


  1. Use ceiling-specific paint for better sticking and longer life.

Preventing Future Water Damage

Preventing Future Water Damage

  • Check your roof, gutters, pipes, and appliances often.


  • Clean gutters every few months.


  • Make sure bathrooms and kitchens have good ventilation.


  • Insulate pipes so they do not drip.


  • Fix even tiny leaks right away.


If you’re a renter, understanding your coverage is crucial. Learn more about how renters insurance applies to water damage in our blog.

When to Call a Professional

You should call a professional if you see a lot of mold, if the wood framing or ceiling joists are damaged, or if there is water near electrical wires, because that can be really dangerous. 


Also, if you just feel unsure about fixing it yourself, it is always better to be safe and get help. A little tip for you, if you are not sure who to call for water damage in the ceiling, try searching for certified water damage restoration companies or licensed roofers near you, and they will know exactly what to do.

Wrapping Up

So, hopefully, you now know how to fix a water-damaged ceiling. Fixing a water-damaged ceiling can sound scary. But if you catch it early, act fast, and follow the right steps, it becomes much easier. Watch for early signs of water damage on the ceiling. Fix small problems right away before they grow into huge repairs.


Remember: Prevention is cheaper, safer, and easier than fixing a collapsed ceiling!


FAQs

  • How to repair water-damaged ceiling plaster? 

    First, cut away any loose or broken plaster carefully. Then patch the area with new plaster or a strong joint compound, smooth it out, let it dry, and sand it lightly. After that, prime and repaint to make it look good again.

  • Is water damage on the ceiling dangerous? 

    Yes, it can be very dangerous if not fixed. Water damage can lead to mold that is bad for your health and weaken the ceiling, so it could fall. Fixing it early keeps your home safe and healthy.

  • Can a water-damaged ceiling be fixed? 

    Yes, it can be fixed. You just need to find the leak, dry everything properly, and repair or replace the damaged parts. Sometimes it is a small patch job, and sometimes you need a bigger fix.

  • Is water damage to the ceiling covered by insurance? 

    It depends on what caused the leak. If it was sudden, like a burst pipe, insurance usually covers it. But if it happened slowly over time because of neglect, they might not pay.

  • Do I need to replace the ceiling drywall after a leak? 

    If the drywall is soft, sagging, or moldy, then yes, you should replace it. If it is just a small water stain and it dried out properly, you might only need to repaint. Always check carefully before deciding.

  • How to dry out a ceiling after a water leak? 

    First, fix the leak and stop the water. Then open windows, use fans, and run a dehumidifier to pull out all the moisture. Keep drying until the ceiling feels totally dry to touch.

  • How long does it take to dry a ceiling? 

    It usually takes about 24 to 72 hours. Using fans and a dehumidifier helps speed it up a lot. Just make sure it is completely dry before you start any repairs.

  • Can you just paint over water stains? 

    No, you cannot just paint over them. You have to use a stain-blocking primer first, or the brown or yellow stain will show right through. After priming, you can repaint it normally.

  • What happens if you ignore a water-damaged ceiling? 

    If you leave it alone, mold can start growing and spread everywhere. The ceiling can also get weak and even collapse. Plus, the longer you wait, the more expensive it gets to fix.


Posted on: April 29, 2025

Bleach to Water Ratio for Mold: How to Kill Mold Safely

Mold is a common problem. It looks ugly. It smells weird. And worst of all, it can make people sick. That’s why cleaning mold quickly is super important. A lot of people ask, “Can I use bleach to kill mold?” The answer is yes, but only if you use it the right way.


So, what’s the bleach to water ratio for mold? Here’s the brief: Mix 1 cup of bleach with 1 gallon of water to kill mold on hard surfaces. For small areas, use 1 tablespoon of bleach per 1 cup of water in a spray bottle.


Let’s walk through everything you need to know, step by step. 

Why Mold Is a Big Problem

Why Mold Is a Big Problem

Mold is a type of fungus. It grows in warm, damp places—like bathrooms, basements, or near windows. Mold can mess up your walls, furniture, and even the air you breathe. Black mold is the most dangerous kind. It can cause headaches, breathing problems, and even allergies. That’s why it’s so important to clean it up fast.


Can Bleach Kill Mold?

Bleach can definitely kill mold, especially on hard, non-porous surfaces like tiles, bathtubs, and sinks. It doesn’t work as well on porous materials like drywall or wood because it can’t reach deep into the surface. 


Products like Clorox bleach are commonly used for this because they’re effective and easy to find. Lysol can help with light mold on surfaces, but bleach is usually the stronger option when it comes to tougher mold problems.


Additionally, you can check out this informative guide to understand the difference between white mold and black mold.

Best Bleach to Water Ratio for Mold

Now let’s get to the heart of it. What’s the right amount of bleach to use?


Use Case Bleach Water Ratio
General cleaning 1 cup 1 gallon 1:10
Spray bottle use 1 tablespoon 1 cup 1:16
Stronger outdoor cleaning Use the product as-is Follow label (See product)
Example: 121 oz. Pro Results Outdoor Cleaner Pre-mixed solution No need to dilute Ready to use


This is the standard bleach dilution for mold that most professionals use.


Here’s a PDF of the Bleach Dilution Ratio Chart for disinfecting, available for download by clicking the link below.


How to Make a Bleach Mixture to Kill Mold

Alright, let’s start by making your bleach mix the right way.


Step 1: Get ready and stay safe

First things first—put on rubber gloves and a face mask. Bleach has a strong smell and can bother your eyes, nose, and skin. It’s better to be safe.


Step 2: Keep the air fresh

Open a window or two. If you have a fan, turn it on. You want good airflow so you’re not breathing in too much of the bleach smell.


Step 3: Mix bleach with water

Now comes the important part—mixing. For general mold cleaning, the best bleach-to-water ratio is:


  • 1 cup of bleach in 1 gallon of water


If you’re using a spray bottle, mix:


  • 1 tablespoon of bleach in 1 cup of water


This is strong enough to kill mold but still safe to use on most surfaces.


Step 4: Pour the mix into a bottle or bucket

Use a clean spray bottle if you want to spray it on. Or just pour the mix into a bucket if you’re going to dip a cloth or sponge into it.


And that’s it! You now have your bleach solution to kill mold.


How to Clean Mold with Bleach

How to Clean Mold with Bleach

Now let’s talk about how to actually use this bleach mix to get rid of the mold.


Step 1: Apply the bleach mixture

Spray or gently wipe the bleach mix onto the moldy area. Make sure it covers the mold well. You don’t need to soak it—just enough to keep the spot wet.


Step 2: Let it sit for a few minutes

Let the bleach sit for 5 to 10 minutes. This gives it time to kill the mold properly. You don’t have to rush.


Step 3: Scrub it clean

Use a sponge or a soft brush and gently scrub the area. If the mold is stubborn, you might need to go over it twice.


Step 4: Rinse with clean water

Once you’re done scrubbing, rinse the spot with clean water. This removes any leftover bleach and mold.


Step 5: Dry the area well

Use a towel to dry the area, or just let it air-dry with a fan or open window. Mold loves moisture, so drying is super important.


This is how to clean mold or mildew with bleach without damaging surfaces. If you’re cleaning walls, remember to stick to the right bleach-to-water ratio for mold on walls. Don’t make it stronger than needed—too much bleach can damage the paint or surface.

Where Can You Use Bleach?

  • Bathroom tiles
  • Shower walls
  • Kitchen counters
  • Window frames
  • Outdoor decks or siding


Just be careful when using it on the outside of the house. That’s where you use products like Pro Results Concentrated Liquid Outdoor Bleach Cleaner. Check the bottle for directions.

When Not to Use Bleach

Bleach doesn’t work well on:


  • Wood
  • Fabric
  • Drywall
  • Carpet


These materials soak in mold deep inside. Bleach can’t reach it. It just cleans the surface. In these cases, use vinegar or hydrogen peroxide instead. Or call a pro if it’s bad.

Bleach Safety Tips

Bleach Safety Tips

Always remember—never mix bleach with ammonia or any other cleaner. It might seem like a good idea to make it stronger, but doing this creates a toxic gas that can be very harmful. Stick to bleach and water only. 


Also, you have to wear protective gear like gloves, goggles, and a face mask while cleaning. Bleach is powerful, and you don’t want it getting on your skin or in your eyes. Make sure kids and pets stay far away from the area while you clean. 


And before you start, take a quick look at the label, especially if you’re using something strong like a concentrated bleach cleaner. It’ll tell you exactly how to use it safely.

After Cleaning – What Next?

Once you’ve finished scrubbing and cleaning the mold, it’s super important to rinse off any leftover bleach with clean water. Leaving bleach behind can damage the surface or cause irritation. 


After rinsing, dry the area well—use a towel or just let it air dry with a fan or open window. Mold loves damp places, so keeping things dry is the best way to stop it from coming back. 


A dry, clean space is your best defense against future mold problems.

Wrapping Up

Bleach is strong. It’s cheap. And it works well on hard surfaces. Just use the correct bleach to water ratio for mold, and always follow safety steps. Whether you’re tackling a bathroom wall or outdoor siding, the right bleach mixture to kill mold can help you clean fast and clean safe.


Got a big mold problem? Call a pro. Stay safe and breathe easy!


Interested in learning how to check for mold after water damage? Then, here’s a detailed guide for you.


FAQs

  • How long does it take for bleach water to kill mold?

    It usually takes 5 to 10 minutes for bleach water to kill mold on hard surfaces like tiles or bathtubs.

  • What is the bleach to water ratio for cleaning outside of the house?

    For outdoor cleaning, use a stronger mix—about 1 part bleach to 3 parts water, or try a specialized outdoor bleach cleaner for tougher mold spots.

  • Does bleach kill mold 100%?

    Bleach can kill surface mold 100 percent on non-porous areas like tiles or glass, but it won’t completely remove mold from porous surfaces like wood or drywall.

  • How to clean mold or mildew with bleach without damaging surfaces?

    Spray the bleach mixture on the mold, wait 5-10 minutes, scrub gently, rinse the area with clean water, and let it dry to prevent damage.

  • How to kill black mold in under 5 minutes?

    For black mold, act quickly by using a strong bleach solution, protective gear (gloves, mask), and ensure the area is well-ventilated—usually, it can be controlled in under 10 minutes.

  • What is the bleach to water ratio for mold on walls?

    For mold on walls, mix 1 cup of bleach with 1 gallon of water for an effective solution.

  • What is the bleach to water ratio for mold in a spray bottle?

    For a spray bottle, mix 1 tablespoon of bleach per 1 cup of water for small, targeted mold removal.


Posted on: April 22, 2025

Does Renters Insurance Cover Water Damage? Find Out Now!

If you’re renting a home or an apartment in the US, getting renters insurance is one of the smartest moves you can make. It protects your things, helps you with temporary housing, and covers you if you accidentally damage someone else’s property.


But here’s where many people get confused—what about water damage? Like, what if there’s a leak? Or rain comes through the roof? Or the washing machine overflows? Does renters insurance cover water damage? 


Let’s break it all down. We’ll go over what renters insurance usually covers, what it doesn’t, and what steps you should take if your stuff gets wet.

What is Renters Insurance?

Renters insurance is a policy for people who rent homes. It doesn’t cover the building itself. That’s the landlord’s job. But it covers your personal stuff inside the home.


Here’s what typical renters insurance coverage includes:


Coverage Type What It Means
Personal Property Covers your clothes, furniture, electronics, and more
Liability Helps if you accidentally damage property or hurt someone
Loss of Use Pays for hotel, food, and travel if you can’t live at home


What it usually doesn’t cover:


  • Flood damage
  • Earthquakes
  • Pests like bed bugs or rodents
  • Damage from long-term leaks or poor maintenance


We’ll explain more about these later.

First, We’ll Know What Water Damage is

Water damage means your things got damaged by water. But insurance only helps if it was sudden and accidental, not something that happened slowly over time.


Sudden vs. Gradual Water Damage


  • Sudden: A pipe bursts and floods your room. The washing machine overflows.


  • Gradual: A slow drip under your sink that’s been going on for weeks. Usually not covered.


Common causes of water damage:


  1. Burst pipes


  1. Overflowing toilets or tubs


  1. Leaky roof


  1. Sewer backups


  1. Flooding from outside


Besides, you can take a look at this detailed guide on how to get insurance to pay for water damage.

Does Renters Insurance Cover Water Damage? Water Damage That IS Covered

Yes, of course, renters insurance covers water damage to a certain extent. Let’s talk about the times when renters insurance usually has your back. These are the situations where your insurance will probably step in and help.


So, what does renters insurance cover?


Burst Pipes

Burst Pipes

So imagine it’s freezing outside and one of the pipes in your place suddenly bursts. Water goes everywhere and ruins your stuff. In most cases, your renters insurance will cover that damage.


BUT, if you went on holiday in winter and didn’t leave the heating on, and the pipe froze because of that… the insurance company might say, “Sorry, that’s on you.”


Overflowing Toilets

Overflowing Toilets

Yup, it happens. If your toilet suddenly overflows and damages your belongings, renters insurance usually helps. But let’s say it overflowed because you kept flushing things you weren’t supposed to—like wipes or toys—that might be considered your fault, and they could refuse the claim.


Washing Machine Leaks

Washing Machine Leaks

Let’s say your washing machine suddenly leaks all over the floor and soaks your clothes, your rug, or your books. That’s usually covered by renters insurance.


Now, here’s the twist: if the machine belongs to the landlord (and not you), the landlord may also be responsible for fixing the actual machine, but your own things should still be covered by your policy.


Rain Coming In

Rain Coming In

This one depends. If there’s a storm and strong winds blow off a part of the roof, and rain comes in and ruins your stuff—yes, that’s typically covered.


But if you left the window wide open and it rains straight into your bedroom, that’s probably not covered because that would be seen as your mistake.


You can visit this informative guide to learn how to prevent water damage caused by rain.


Faucet Left On

Faucet Left On

Let’s say you left the bathroom tap running by accident, and water spills all over the floor, soaking your clothes or furniture. Most of the time, that’s covered by renters insurance.


But if you do that kind of thing over and over again, the insurance company might get suspicious and could eventually deny future claims.


If you’re somehow interested in learning how to fix a leaky faucet, you can check out this write-up now!


Loss of Use (Temporary Relocation)

Here’s a helpful one. If water damage is so bad that you can’t stay in your home, maybe the walls are soaked, or the place smells like mold, your insurance might pay for your hotel, food, and even travel costs while your place is being fixed. That’s called loss of use coverage.

Water Damage That Is NOT Covered

Now let’s talk about the stuff that renters insurance won’t cover—these are situations you need to be careful about.


Flood Damage

This surprises a lot of people. But renters insurance doesn’t cover flooding that comes from outside, like heavy rain, storms, or rivers overflowing.


If you live in an area where floods can happen, you’ll need to buy separate flood insurance. That’s the only way to be protected from that kind of water damage.


Sewer Backup

If dirty water backs up from a toilet, drain, or sink and damages your stuff—gross, right?—that’s not covered by a regular renters insurance policy.

However, if you add on something called water backup coverage to your policy, then you might be covered.


Poor Maintenance or Neglect

This means if something started leaking and you just ignored it or didn’t report it for a long time, and then it caused a big problem, insurance won’t pay for the damage. They expect you to take care of the place and tell someone when something’s going wrong.


Long-Term Leaks

If there’s a tiny drip under your sink and it’s been leaking for months and months, and now there’s mold or rotting wood,  insurance usually says, “Nope.”


Why? Because renters insurance generally covers water leak damage, especially if it’s sudden or accidental damage, not stuff that builds up slowly over time.


Intentional Damage

If you or your friends break something on purpose, like flooding the place as a prank or doing something reckless that causes water damage, insurance won’t help.


They only cover accidents, not things done on purpose.

Tenant vs Landlord Responsibilities – Who’s in Charge of What?

Tenant vs Landlord Responsibilities

Let’s talk about who’s responsible when water damage happens—you (the tenant) or the landlord. It can get a bit confusing, but don’t worry, we’ll explain it in the simplest way.


Tenant’s Responsibility (That’s You)

If the water damage is your fault—like you accidentally leave the tap running or break a washing machine hose—then you might be held responsible.


But here’s the good news: if you have renters insurance, your liability coverage can help pay for the damage. That includes things like damage to someone else’s stuff or even water leaking into a downstairs neighbor’s flat.


So, even though it was an accident, it’s still your responsibility, but your insurance may help cover the costs.


Landlord’s Responsibility

Now, the landlord is in charge of the actual building. That means the walls, ceiling, pipes, roof—all that stuff.


So if water damage happens because the roof is leaking, or a pipe inside the wall bursts, or there’s a problem with the structure of the building, then it’s the landlord’s job to fix it.


They are responsible for making sure the property is safe and livable.


Also, want to learn how to spot property erosion before it gets worse? Check out our full blog for helpful tips!

How to Enhance Your Coverage

Consider adding:


  1. Water Backup Coverage: Protects against damage from sewer or drain backups.


  1. Scheduled Personal Property: Provides additional coverage for high-value items.


  1. Increased Limits: If you own expensive belongings, consider raising your coverage limits.​

Tips for Staying Protected


For Tenants:


  • Read your policy thoroughly.


  • Address maintenance issues promptly.


  • Use water responsibly.


  • Maintain an inventory of your belongings with receipts.


For Landlords:


  • Encourage tenants to have renters insurance.


  • Maintain the property regularly.


  • Install leak detection systems.​

How to File a Water Damage Claim


  1. Contact your insurer immediately.


  1. Document the damage with photos or videos.


  1. Prevent further damage if possible.


  1. Submit receipts and a list of damaged items.


  1. Keep records of any additional living expenses.​

Wrapping Up

So, hopefully, you have got the right answer to your question, “Does Renters Insurance Cover Water Damage?” Renters insurance can provide significant protection against water damage, but it’s essential to understand the specifics of your policy. Always read your policy details, consider additional coverage options, and maintain good communication with your landlord to ensure you’re well-protected.​


If you don’t want the stress of hiring lots of different contractors or handling insurance paperwork, SOS Restoration can help. We talk directly with your insurance company and take care of everything—from water and fire damage to mold and other serious problems.


We’re available 24 hours a day, 7 days a week, and we’ll walk you through the whole water damage restoration process step by step.


Your comfort and peace of mind come first. Give us a call today!


FAQs

  • How much is renters insurance in the US? 

    Renters insurance in the US usually costs around 14 to 22 dollars per month, or about 170 to 263 dollars per year. The price depends on where you live, how much stuff you own, and the coverage you choose. States like Louisiana have higher rates, while places like Wyoming are much cheaper.

  • Does State Farm renters insurance cover water damage? 

    Yes, State Farm renters insurance usually covers sudden water damage like a burst pipe or plumbing leak. But it won’t cover flood damage or problems from ongoing leaks. For flood coverage, you’d need a separate policy through the National Flood Insurance Program.

  • Does rental property insurance cover water damage? 

    Yes, rental property insurance usually covers water damage from burst pipes, appliance malfunctions, or severe weather. However, it doesn’t cover flood damage or sewer backups, which need separate insurance. Tenants are responsible for damage caused by negligence, so they should get renters insurance for personal protection.

Posted on: April 22, 2025

6 Steps on How to Prevent Water Damage Caused by Rain

Let’s face it—when heavy rain hits, the last thing we want is water sneaking into our homes. But it happens a lot. Rain might seem harmless, but it can quietly cause serious damage to your roof, walls, basement, and even your furniture.


So, in this blog, we’re going to talk about how to prevent water damage caused by rain. We’ll go over why this happens, what to check, and simple steps to stop water damage before it even begins. 


Whether you’re a homeowner, a renter, or even a landlord, this guide is for you.

Why Preventing Rainwater Damage is So Important

Water from rain might not look dangerous, but once it enters your home, it can:


  • Damage walls, ceilings, and floors
  • Ruin furniture, carpets, and electronics
  • Cause mold, which is bad for your health
  • Weaken your home’s foundation over time
  • Lead to costly repairs


And you know what? Most of these problems can be avoided with a little preparation.

What Causes Water Damage in Homes During Heavy Rains?

Water doesn’t just come in for no reason. Here’s how it usually gets in:


  • Roof problems like missing or broken shingles
  • Clogged gutters that overflow
  • Cracks in basement walls or foundation
  • Old or badly sealed windows and doors
  • Poor drainage around the yard


Once rainwater finds even a tiny opening, it slowly gets inside. Over time, it creates rain-related water damage that many people don’t even notice until it’s too late.

How to Prevent Water Damage Caused by Rain (During Heavy Rainstorms Into the House)

Let’s break it down step-by-step. These are easy things you can check or fix to protect your home before the next storm hits.


1. Inspect Your Roof Regularly

Inspect Your Roof Regularly

Your roof is your first line of defense. Check for:


  1. Missing or damaged shingles
  2. Cracks or small holes
  3. Signs of moss or water spots


It’s a good idea to hire a professional to check your roof once a year, especially before the rainy season. This small step can save you a ton of money later.


2. Clean and Maintain Your Gutters

Clean and Maintain Your Gutters

Gutters help move rainwater away from your home. But if they’re blocked by leaves or dirt, they’ll overflow—and water will spill down your walls.


What to do:


  1. Clean your gutters at least twice a year
  2. Install gutter guards to prevent clogging
  3. Check for leaks or sagging in the gutter pipes


3. Waterproof Your Basement or Foundation

Waterproof Your Basement or Foundation

Basements are one of the first places where water sneaks in.


To stop that:


  1. Apply waterproof sealant to basement walls
  2. Install a sump pump to remove extra water
  3. Make sure your yard slopes away from the house so water doesn’t collect near the foundation


4. Seal Windows and Doors

Seal Windows and Doors

If rainwater is getting in through windows or under doors:


  • Use weather stripping or caulk around the edges
  • Replace old or cracked seals
  • For extra protection, consider stormproof windows


This helps keep not only water but also cold air out.


5. Install a Proper Drainage System Around Your House

Install a Proper Drainage System Around Your House

Sometimes the ground around your home doesn’t drain water well.


Here’s what helps:


  • French drains, trench drains, or dry wells
  • Filling in areas where water pools
  • Making sure your yard has proper slope and drainage


This keeps rainwater flowing away from your house, not toward it.


6. Regularly Check Plumbing and Pipes

Regularly Check Plumbing and Pipes

Rain might cause pressure changes in your plumbing system, leading to:


  • Leaks in walls or ceilings
  • Drain backup
  • Slow water flow


What you can do:


  1. Inspect damp spots on walls or floors
  2. Get a plumber to inspect pipes before the rainy season
  3. Install a backflow valve to prevent sewer water from coming back up


You can visit this informative guide to learn how to dry walls better after a water leak.

Protect the Inside of Your Home Too

Even if a little water gets inside your house, you can still protect your stuff from being ruined. A smart way to do this is by lifting furniture slightly off the floor in places where water might enter, like basements or near windows. 


Keep your important items like documents or electronics in waterproof containers, especially if they’re stored in low areas. You can also install water leak alarms—these handy devices make a sound when water touches the floor, giving you a heads-up before it gets worse. 


These are simple habits, and you don’t need fancy tools—just small, smart actions to prevent water and flood damage in your home.

Have an Emergency Plan Ready

Have an Emergency Plan Ready

Sometimes, heavy rain shows up suddenly, so it’s good to be prepared just in case. Keep buckets, towels, or waterproof tape ready so you can quickly handle small leaks if they appear. Make sure you know how to turn off your home’s water and electricity in case of an emergency to stay safe. 


It’s also wise to have the contact number of a local 24/7 water damage expert saved in your phone, just in case things get serious. Lastly, double-check your home insurance to make sure it covers damage caused by rain, so you’re not caught off guard.


Here, you can check out to learn how to get insurance to pay for water damage.

Final Tips & Prevention Checklist

Here’s a quick reminder list of what you can do:


Before Rainy Season:


  1. Inspect the roof and fix issues
  2. Clean gutters and downspouts
  3. Seal windows, doors, and cracks


During the Rainy Season:


  1. Check sump pumps are working
  2. Monitor water levels in the basement
  3. Keep emergency items ready


All Year Round:


  1. Maintain proper drainage
  2. Keep an eye on pipes and plumbing
  3. Use water sensors for early alerts


Remember: the cost of prevention is always lower than repair.

Wrapping Up: Take Action Before the Rain Hits

So, that’s how to prevent water damage caused by rain. Water damage from rain is common, but also very preventable. We just need to stay one step ahead of the weather. By taking care of your roof, gutters, basement, and windows, you can prevent water damage from rain and avoid major problems down the line.


So next time you see dark clouds forming—relax. You’ve already done the work to protect your home.


FAQs

  • How do you fix water damage from rain?
    |
    First, stop the water from coming in by fixing the leak (like sealing a roof or wall crack). Then, dry the area completely using fans or a dehumidifier. Finally, clean and repair any damaged parts like walls, floors, or furniture to stop mold from growing.
  • Does homeowner insurance cover water damage from rain? 

    Yes, homeowner insurance may cover rainwater damage—but only if it comes in suddenly through a covered problem, like a damaged roof or window. It usually won’t cover water that comes in slowly over time or from poor maintenance. Always check your policy to be sure.

  • How can we protect rainwater? 

    We can protect rainwater by collecting it in clean barrels or tanks with lids to keep out dirt and insects. Make sure it’s stored safely and away from chemicals or waste. You can also use filters or purifiers to keep the rainwater safe for garden use or cleaning.

  • How to prevent water damage after a leak? 

    Act quickly—first, fix the leak so water stops coming in. Then, dry the area fast to stop mold and smells. Lastly, check walls and floors for hidden damage and fix them to keep the problem from coming back.

Posted on: April 15, 2025

How Does White Mold Differ from Efflorescence

Have you ever noticed some white stuff on your basement wall or in the corner of a room and wondered, “Is that mold or just some powdery dust?” It happens to many. 


Many people get confused between white mold and something called efflorescence. They both look similar, but they are very different in how they appear, what causes them, and what they mean for your health and home.


So, how does white mold differ from efflorescence? Here’s the brief: White mold is a harmful fungus that grows on damp surfaces like wood or drywall and can affect your health. 


On the other hand, efflorescence is just harmless white salt left behind on brick or concrete when water dries up.


Let’s break it down in the simplest way possible so you’ll never mix them up again!

What is White Mold?

What is White Mold

White mold is a kind of fungus that shows up in places that are damp, dark, and don’t get much fresh air. It grows quietly over time and can easily spread if the conditions stay wet or humid.


Where Does It Grow?

You can usually find white mold in places like basements, on wooden beams, on drywall, around window sills, or even on furniture that’s been kept in a damp area for a while. These places usually don’t have good airflow and often stay moist, which helps mold grow.


What Does It Look Like?

White mold often looks fuzzy or powdery, kind of like dust, but it’s softer to the touch. It’s usually white, but sometimes it might have a light green or grey color too. One clear sign that it’s mold and not dust is that it tends to grow back even after you wipe it off.


What Causes White Mold?

White mold usually happens because of things like high humidity in the air, poor ventilation, leaks in the home, flooding, or wet building materials like damp wood or drywall. When these things are present, mold finds the perfect place to grow.


Is White Mold Harmful?

Yes, white mold can be harmful to your health. It may cause allergies, sneezing, coughing, itchy skin or eyes, and can be especially bad for people who have asthma or other breathing problems. So it’s important to clean it properly and fix the moisture issues quickly.


Want to learn how to check for mold after water damage? Check out this detailed write-up now!

What is Efflorescence?

What is Efflorescence

Efflorescence is not mold at all—it’s actually just salt. It happens when moisture inside bricks, cement, or concrete moves through the wall and carries salt to the surface. Once the water dries, it leaves a white layer of salt behind.


Where Does It Appear?

Efflorescence usually shows up on concrete floors, brick walls, basement or foundation walls, and sometimes around chimneys. These are all areas that tend to have moisture or are made from materials that can let water pass through.


What Does It Look Like?

Efflorescence looks like a bright white, powdery, or chalky layer on the surface. It feels like fine dust when you touch it, and unlike mold, it doesn’t grow back once you clean it—unless the moisture problem comes back.


What Causes Efflorescence?

It happens when water moves through a wall and carries natural salts from inside the material. When the water reaches the surface and evaporates, it leaves the salt behind. This usually happens in new buildings, damp basements, or places where there is extra moisture in the air or ground.


Is Efflorescence Harmful?

No, efflorescence is not harmful to your health. It doesn’t cause allergies or breathing problems. However, it’s still a sign that there’s too much moisture in that area, which means you should fix the moisture issue to prevent further problems.

How Does White Mold Differ from Efflorescence?

How Does White Mold Differ from Efflorescence

Let’s show you a comparison table showing the difference between white mold vs. efflorescence.


Feature White Mold Efflorescence
What it is A fungus A salt deposit
Appearance Fuzzy, soft, white/grey/greenish Chalky, powdery, bright white
Grows on Wood, drywall, carpet, furniture Brick, concrete, cement
Health Risk Yes – can cause allergies & illness No – not harmful
Grows back if wiped? Yes No
Smell Musty or damp smell No smell
Needs treatment? Yes – needs proper cleaning & care Only needs moisture control

How to Test: Is It Mold or Efflorescence?

If you’re not sure whether that white stuff is mold or salt, here’s how you can test:


1. Water Spray Test


  • Lightly spray the spot with water.
  • If it disappears, it’s likely efflorescence.
  • If it stays, it’s probably mold.


2. Smell Test


  • Mold usually smells musty or damp.
  • Efflorescence doesn’t have a smell.


3. Touch Test


  • Mold feels soft and might smear.
  • Efflorescence feels dry and gritty.


4. Mold Test Kit


  • You can buy a mold test kit at a hardware store to be 100% sure.
  • Or, call a professional inspector.


Besides, you can visit this informative guide to learn the difference between white mold vs black mold.

How to Remove White Mold and Efflorescence

Here’s how you can remove white mold and efflorescence.


Removing White Mold (Do this carefully!)


  1. Wear gloves and a mask.


  1. Mix water and vinegar or hydrogen peroxide in a spray bottle.


  1. Spray and scrub the area gently.


  1. Let it dry completely.


  1. Use a dehumidifier to stop future growth.


  1. If the mold covers a large area, it’s best to call a professional mold removal service.


Removing Efflorescence


  1. Use a dry brush to scrub off the white powder.


  1. For stubborn spots, use a vinegar and water mix.


  1. After cleaning, find and fix the moisture source (like leaks or poor drainage).

When Should You Call a Professional?

When Should You Call a Professional

You should call a professional if mold keeps coming back even after you clean it, if white mold is covering a large area, or if anyone in your home starts having health problems like allergies or trouble breathing. It’s also a good idea to call for help if your home has a big moisture or drainage problem that’s too hard to fix on your own.


At SOS Restoration, we help clean up mold and fix water damage in your home. Our team uses the right tools to remove the mold completely and make sure it doesn’t come back again. We also deal with your insurance company for you, so you don’t have to worry about claims or paperwork.


We’re available 24/7 for any emergency. Our prices are fair, and we always work hard to make sure you’re happy with the results.


Give us a call, and we’ll take care of everything for you!

How to Prevent Both

To Prevent White Mold:

Use a dehumidifier to keep the air dry, and make sure air moves around by using fans. Fix any leaky pipes or roofs quickly so moisture doesn’t build up. In places that often stay damp, like basements or bathrooms, try using special mold-resistant paint to stop mold from growing.


To Prevent Efflorescence:

Waterproof your basement walls to stop water from soaking through. Make sure water drains away from your home by improving the ground around it. Use vapor barriers (a special plastic sheet) under concrete floors to keep moisture from rising. Also, seal any cracks in your foundation so water can’t sneak in.


Also, interested to learn how to get insurance to pay for water damage? Here is a detailed guide for you to check.

Wrapping Up – Know the Difference & Act Fast!

So now you know the answer to the question, “How does white mold differ from efflorescence?”


White mold is a fungus that’s dangerous to your health and needs to be removed properly. On the other hand, efflorescence is just salt left behind by water—it’s not harmful, but it tells you that you might have a moisture issue.


The key is:


  • Look closely
  • Test the spot
  • Fix the moisture problem


And don’t wait too long—especially if it’s mold.


FAQs

  • Does Efflorescence Require an Inspection?

    Efflorescence doesn’t always need a full inspection because it’s not harmful, but if it keeps coming back, it’s smart to get a professional to check for hidden moisture problems in your walls or foundation.

  • What Does White Mold Look Like on Concrete?

    White mold on concrete looks like a soft, fuzzy, or powdery layer that might be white, light gray, or even slightly green. It can look like dust, but it feels soft and can grow back after cleaning if moisture remains.

  • Will White Mold Dissolve in Water?

    No, white mold won’t completely dissolve in water. You might wipe it off, but it often comes back if you don’t fix the dampness or moisture problem that caused it in the first place.

Posted on: April 15, 2025

5 Common Appliance Leaks That Can Lead to Water Damage

Have you ever noticed a small puddle near your fridge or washing machine and thought, “It’s probably nothing”? Well, it could be a sign of a bigger problem. Appliance leaks are one of the leading causes of water damage in homes, and if not caught early, they can cause serious issues. 


Water damage can ruin floors, walls, and even lead to mold growth. In this blog, we’ll show you the 5 most common appliance failures that can lead to costly damage. We’ll also share easy tips on how to prevent leaks and what to do if you find one. 


Let’s keep your home safe from water damage!

Top 5 Household Appliance Leaks That Could Cause Water Damage


Let’s break down the top appliances that are most likely to leak and can cause water damage. Also, let’s learn how to prevent them.


1. Refrigerator Leaks

Refrigerator Leaks

Refrigerators are one of the appliances most likely to leak. If your fridge leaks, water can quickly spread to your floors or even cause problems with electrical outlets.


Common Causes:


  1. Clogged Defrost Drain: Over time, the defrost drain can get blocked with food bits or ice. When that happens, water can’t drain properly, so it ends up on the floor.


  1. Faulty Water Line Connections: If your fridge has a water line for things like ice makers or water dispensers, a loose or broken connection can cause a leak.


Signs of a Leak:


  • You’ll notice puddles of water near the fridge.


  • There could also be water pooling in the freezer section.


Preventive Tips:


  1. Inspect the Defrost Drain: Check the defrost drain regularly and clean it out if it gets clogged.


  1. Check Water Lines: Look at the water lines for any loose or worn-out connections and replace any broken seals.


2. Washing Machine Leaks

Washing Machine Leaks

Washing machines cause water damage if they leak, especially if it’s a small leak that you don’t notice at first.


Common Causes:


  1. Broken Hoses or Fittings: Over time, hoses can get old, crack, or break, leading to water leaks.


  1. Overfilled Washing Machine: Overloading the washing machine puts extra stress on the hoses and connections, causing them to leak.


Signs of a Leak:


  • You might see water pooling around the washing machine.


  • Or, you might notice damp flooring in the laundry room.


Preventive Tips:


  1. Inspect Hoses: First, check the hoses for any cracks or wear and tear. If they’re damaged, replace them.


  1. Avoid Overloading: Don’t overload your washing machine. It helps avoid stressing the hoses.


  1. Clean Filters: Clean the filters and drain pumps regularly to keep everything working smoothly.


3. Dishwasher Leaks

Dishwasher Leaks

Dishwashers are super useful, but they can leak, and that water can cause damage to your kitchen floor.


Common Causes:


  1. Worn-out Door Seals: The seals around the dishwasher door wear out over time, letting water escape.


  1. Blocked or Clogged Drainage Hose: If the drainage hose gets blocked, water can back up and leak out.


Signs of a Leak:


  • Water pooling underneath the dishwasher after a wash cycle.


  • Your kitchen floor might feel damp after running the dishwasher.


Preventive Tips:


  1. Clean Door Seals: Regularly check and clean the door seals to keep them in good shape.


  1. Check the Drain Hose: Look for any clogs or blockages in the drainage hose.


4. Water Heater Leaks

Water Heater Leaks

Water heaters are another appliance that can cause big problems if they leak. Water around the base of the heater can lead to moisture damage to your floors and walls.


Common Causes:


  1. Corrosion Inside the Tank: Over time, water heaters can rust or corrode, causing leaks.


  1. Loose or Faulty Connections: If the water connections aren’t tight or are damaged, they can leak.


Signs of a Leak:


  • Water around the base of the heater.


  • You might notice low water pressure or inconsistent heating.


Preventive Tips:


  1. Inspect for Corrosion: Regularly check the water heater for any rust or corrosion.


  1. Check Valves: Make sure the inlet and outlet valves are tightly secured to prevent leaks.


5. Air Conditioner Leaks

Air Conditioner Leaks

Air conditioners can leak water, especially when the drain line gets clogged. This can lead to moisture building up around your floor.


Common Causes:


  1. Clogged Drain Line: If the drain line gets blocked by dirt or debris, water can’t drain properly, causing a leak.


  1. Improper Installation or Maintenance: If the AC isn’t installed correctly or serviced regularly, it may start leaking water.


Signs of a Leak:


  • You might notice water dripping from the air conditioning unit.


  • There could also be excess moisture around the floor.


Preventive Tips:


  1. Clean the Drain Line: Clean the drain line regularly to avoid clogs.


  1. Proper Installation and Servicing: Make sure your air conditioner is installed correctly and serviced every year to prevent leaks.

How Appliances Lead to Water Damage and Mold

Leaks from appliances can cause a lot of property damage if they’re not fixed quickly. If left unchecked, the water can spread to your floors, walls, and ceilings, leading to expensive repairs. 


When water leaks for too long, it creates a suitable environment for mold and mildew to grow. This can harm your health and make the damage worse. Over time, the constant water can weaken the structure of your home, including the foundation and walls, causing bigger, long-term problems.


Visit this insightful write-up to get a detailed idea of how to check for mold after water damage.

How to Prevent Appliance Leaks

How to Prevent Appliance Leaks

To prevent all of this, regular inspection and maintenance are key. Check your appliances often to spot any potential issues early on. It’s also smart to get your appliances serviced by a professional to make sure everything’s working right. 


If you notice a small leak, you might be able to fix it yourself, but if it’s a bigger problem, especially with water heaters or refrigerators, it’s better to call in a pro to avoid more damage.

Sue the Manufacturer or File an Insurance Claim?

Sue the Manufacturer or File an Insurance Claim

So, after an appliance defect causes water damage to your home, should you sue the manufacturer or file a homeowner’s insurance claim?


If an appliance defect causes water damage to your home, you may wonder whether to sue the manufacturer or file a homeowner’s insurance claim. In most cases, filing an insurance claim is the first step, as insurance can cover the costs of repairs. 


However, if the appliance defect is due to a manufacturing error, you might consider legal action. Consult with an attorney to explore your options.


If you’re wondering how to get insurance to pay for water damage, here is a detailed guide for you to check.

Wrapping Up

Appliance leaks are common, but they can cause serious water damage if not dealt with quickly. Regular maintenance, inspections, and quick action can help stop these issues and protect your home from costly repairs. Always stay vigilant and be proactive about checking your appliances. If you find a leak, address it immediately to avoid long-term damage.


Remember that taking care of your appliances today can save you from major headaches tomorrow.


FAQs

  • How to fix a wall after a water leak?

    To fix a wall after a water leak, first, dry the area completely to prevent mold. Then, patch up any holes or damaged spots with wall filler. Finally, sand it smooth and paint over the patched area.

  • How long does it take for water damage to dry out?

    It usually takes about 72 hours for a room to dry after water is removed. However, fixing the structure and removing mold can take up to a month. The drying time depends on the damage and how much water there is.

  • What is the most common water leak?

    The most common water leak in homes is from toilets. It often happens because the flapper, fill valve, or flush valve is damaged. Leaks can also happen at the base of the toilet or around other parts. Other common leaks can come from dripping faucets, burst flexible hoses, leaking pipes, and appliances like dishwashers and water heaters.

  • How can water damage to electrical outlets and the appliances plugged into them be prevented?

    To prevent water damage to electric outlets and appliances, make sure to keep them dry and away from water sources. Use waterproof covers for outlets in wet areas. If water leaks near outlets, turn off the power immediately to avoid electrical hazards.

Posted on: April 5, 2025

How to Dry Walls Better After a Water Leak

Water leaks in your home can cause a lot of damage, and one of the most affected areas is your walls. If the water isn’t dried quickly, it can lead to mold growth, warping, and even structural damage. So, knowing how to dry walls better after a water leak is super important to prevent bigger issues down the line.


Simply put, to dry walls after a water leak, you have to —

  • remove the water with towels, fans, and a dehumidifier. 


  • Make sure the walls are completely dry to prevent mold and damage.


Let’s walk through the best ways to dry your walls after a water leak, focusing on the techniques that will help you get it done effectively and safely.

How to Identify Water Damage on Walls

How to Identify Water Damage on Walls

Before you start drying your walls, you need to check how bad the damage is. Look for these signs:


  • Visible Signs: Water stains, discoloration, or if the paint starts peeling or bubbling.


  • Hidden Signs: A musty smell, warped walls, or drywall that’s crumbling.


If you notice any of these, it’s time to start drying!


Check out this guide to learn about the categories of water damage.

Different Types of Walls and How to Dry Them

Not all walls are the same, so how you dry them depends on what they’re made of.  


Let’s break down how to handle the most common types:


A. Drywall

Drywall

What’s Special: Drywall soaks up water fast and can grow mold if not dried quickly.


Drying Techniques for Wet Drywall:


  1. Wipe off any visible water with a towel or sponge.


  1. Use a dehumidifier to take moisture out of the air.


  1. Set up fans to help dry the wall faster.


  1. If the water has soaked in too deep, drill small holes at the bottom of the wall to let air behind it.


Drywall Repair after Water Damage: To fix water-damaged drywall, first, take out the damaged parts. Make sure the area is completely dry. Then, add new drywall to patch it up. Apply joint compound, smooth it out by sanding, and finally, prime and paint the area.


When to Replace: If it’s soggy, moldy, or sagging, it’s time to replace the drywall.


You can check out this informative write-up to learn how to check for mold after water damage.


B. Plaster Walls

Plaster Walls

What’s Special: Plaster is thicker and takes longer to dry than drywall, but it’s less porous.


How to Dry It:


  1. Use a fan to get the air moving.


  1. A dehumidifier is essential to remove moisture from the room.


  1. Don’t overheat it; too much heat can crack plaster.


When to Replace: If it stays damp for too long or cracks, it might need replacing.


C. Brick or Masonry Walls

Brick or Masonry Walls

What’s Special: Brick holds moisture well but takes time to dry.


How to Dry It:


  1. Wipe off the visible moisture with towels.


  1. Open windows and use fans for ventilation.


  1. Avoid using too much heat since it can damage the brick.


When to Replace: If you notice a white powdery residue (efflorescence), clean it after the wall is dry. But if the damage is too much, it might need to be replaced.


D. Wood Paneling or Wooden Walls

Wood Paneling or Wooden Walls

What’s Special: Wood can warp and mold quickly, so drying it fast is key.


How to Dry It:


  1. Dry the surface with towels and a wet/dry vacuum.


  1. Use fans and a dehumidifier to speed up the drying process.


  1. If the wood warps, you might need to sand and refinish it.


When to Replace: If the wood is warped or moldy, it’s time to replace it.

Step-by-Step Guide: How to Dry Walls After a Water Leak

How to Dry Walls After a Water Leak

Here’s a simple, easy-to-follow process to dry your walls:


First, fix the source of the water, like a broken pipe or roof leak. Then, use towels, sponges, or a wet/dry vacuum to soak up any standing water. Open windows and doors to help airflow, which speeds up drying. 


Also, place fans near the wet walls and use a dehumidifier to pull moisture out of the air. Sometimes, water can hide behind the walls, so if you have drywall, drill small holes near the bottom to help the air get behind the wall. 


Lastly, keep an eye out for mold, especially black spots, and take care of it right away to prevent more damage.


Also, if you want to learn how to fix a wall with internal water damage, Here are the steps to follow:


  1. Find and stop the water source: This is crucial to prevent further damage.


  1. Dry the affected area: Use fans and dehumidifiers to thoroughly dry the wall.


  1. Repair damaged materials: Remove and replace any ruined drywall, plaster, or insulation, then repaint and seal the repaired area.

Common Mistakes to Avoid When Drying Your Walls

When drying your walls, it’s easy to make mistakes that could worsen the damage. Here are some common things to avoid:


Mistake What to Do Instead
Using too much heat (can crack plaster or drywall) Use fans and moderate heat for drying.
Ignoring hidden moisture Check behind walls and under floors for water.
Repainting too soon Wait until the walls are fully dry before painting.
Assuming the job is done Always monitor for mold and moisture for a few weeks.

When Should You Call a Professional?

When Should You Call a Professional

If the wall won’t dry, even with fans and dehumidifiers, it’s time to call a professional. If you see mold or mildew, it’s important to get it cleaned by an expert to avoid health issues. 


If your walls are sagging or badly warped, you’ll need a pro to fix it. Professionals use special tools to find hidden water, set up heavy-duty drying equipment, and handle mold removal to make sure it doesn’t come back.


At SOS Restoration, we help remove mold and fix water damage. Our team uses the best tools to get rid of mold and keep it from coming back.


We’re available 24/7 for emergencies. Our prices are fair, and we make sure you’re happy with the job.


Just give us a call, and we’ll take care of everything!

How to Prevent Water Damage in the Future

How to Prevent Water Damage in the Future

Once your walls are dry, you’ll want to make sure water doesn’t sneak in again. Here’s what you can do:


  1. Fix leaks quickly: Check pipes often and fix leaks right away.


  1. Clean gutters: Make sure gutters and downspouts are clear so rainwater doesn’t get into your walls.


  1. Waterproofing: Think about using waterproof paint or vapor barriers in areas that get damp.


  1. Check for cracks: Look for cracks in your walls and seal them up before water can get in.

Wrapping Up

So, that’s all about how to dry walls better after a water leak. Water leaks can be stressful, but drying your walls properly can prevent problems like mold, wood rot, or damage to the structure. If you dry your walls the right way and catch the issue early, you’ll protect your home from long-term damage. And if the job feels too much, don’t hesitate to call a professional!


FAQs

  • How long does a wall take to dry out after a leak?

    Walls usually take 3 to 5 days to dry after a leak, but it depends on how bad the damage is and what the walls are made of. Using fans, dehumidifiers, and opening windows can help speed things up. Humid weather can make it take longer.

  • Will drywall dry out after a leak?

    Yes, drywall can dry out after a leak if you act quickly. Use fans and dehumidifiers to help dry it faster. It’s important to dry it properly to prevent mold and damage.

  • How to dry out damp walls fast?

    To dry out damp walls fast, use fans to increase airflow and dehumidifiers to remove moisture from the air. Also, open windows if possible to let fresh air in. Wipe off any excess water with towels or a sponge.

Posted on: April 5, 2025

What to Do About Commercial Water Damage: Key Facts

Let’s say you’re walking into your business and seeing water everywhere. The floors are soaked. The walls are dripping. You’re panicking, wondering how much this will cost and how long it will take to fix. Sounds stressful, right?


Water damage is one of the biggest headaches for business owners. It doesn’t just ruin your property—it can also shut down your business, cause mold, and lead to costly repairs. Protecting your building from water damage is not just a good idea—it’s a must.


Here’s the good news: you can stay ahead of it. By knowing the facts, taking the right steps, and avoiding common mistakes, you can save your building, your time, and your money.


Let’s break it all down—step by step. These facts will help you understand how to handle commercial water damage and stay prepared for anything.

Key Water Damage Stats


Daily Impact 14,000 people in the U.S. experience water damage daily.
Average Insurance Payout $11,605 per water damage claim.
Annual Claim Frequency 1 in 60 insured homes files a water damage or freezing claim annually.
Flood Impact 99% of U.S. counties experienced flooding between 1996 and 2019.
Basement Damage 98% of basements in the U.S. experience water damage.
Restoration Costs Water damage restoration costs range from $1,322 to $5,954.
Water Wastage Leaks waste nearly 1 trillion gallons of water annually in the U.S.

Add New Post

Commercial Water Damage (What to Do, What Not to Do, and Where to Get Help)


Let’s go through some key facts about commercial water damage remediation, step by step, to help you stay prepared.


1. Regular Maintenance Can Stop Water Damage

Regular Maintenance Can Stop Water Damage


So, what is the biggest concern with water damage? The biggest concern with water damage is hidden structural and mold issues, which is why regular maintenance is crucial.


You know what they say—prevention is better than repair. It’s true! If you stay on top of things like your roof, pipes, and drains, you can avoid a lot of trouble. Check them regularly. 


Oh, and don’t forget to clean out those gutters so water can flow the way it should. It’s also a smart move to have a professional inspect your building once or twice a year.


What You Should Do:


  • Keep an eye out for leaks—often!
  • Fix small issues as soon as you spot them.


What You Shouldn’t Do:


  • Don’t ignore little leaks. They can become massive, expensive problems.


2. Roof Leaks Are a Big Deal

Roof Leaks Are a Big Deal

Let’s talk about roofs. Leaking or broken pipes are a very common cause of water damage. 


Even a tiny leak in your roof can create a disaster if you don’t handle it quickly. And if you live somewhere with heavy rain, hail, or snow? That can make things even worse.


What You Should Do:


  • Fix any roof leaks right away—don’t wait!
  • If your area gets bad weather, make sure your roof is strong enough to handle it.


What You Shouldn’t Do:


  • Don’t wait for damage to get visible. By the time you see it, the problem has already grown.


3. Small Leaks, Big Problems

Small Leaks, Big Problems

A little pipe leak might seem like no big deal, right? Wrong! Over time, even small leaks can destroy walls, ceilings, and floors.


What You Should Do:


  • Check your plumbing regularly.
  • If you see or suspect a leak, call a plumber right away.


What You Shouldn’t Do:


  • Don’t skip those plumbing check-ups. A little effort now can save you from a big mess later.


4. Water Comes in Three Types

Water Comes in Three Types

Water damage isn’t always the same. There are three types of water:


  1. Clean water (white water): Comes from clean sources like a tap.


  1. Dirty water (grey water): Comes from sinks or washing machines.


  1. Hazardous water (black water): Comes from sewage or floods and is dangerous.


What to Do:


  • Leave the cleanup to professionals.


What Not to Do:


  • Don’t touch black water. It’s unsafe.


Type of Water Source Danger Level
White Water Clean taps, rain Low
Grey Water Sinks, appliances Medium
Black Water Sewage, floods High


You can visit this insightful blog to learn the 3 categories of water damage.


5. Not All Insurance Covers Water Damage

Not All Insurance Covers Water Damage

Here’s something many people don’t know—your insurance might not cover all kinds of water damage. For example, if there’s flooding, you usually need a separate policy for that.


What You Should Do:


  • Take a good look at your insurance policy and understand what’s covered.
  • If your area is prone to floods, get flood insurance. Better safe than sorry!


What You Shouldn’t Do:


  • Don’t assume you’re covered for everything. Always double-check with your insurer.


Read this informative blog to learn how to get insurance to pay for water damage.


6. Flood Insurance Might Be Necessary

Flood Insurance Might Be Necessary

Flooding is a whole different story. Standard insurance doesn’t usually cover it. You’ll need special flood insurance for that.


What You Should Do:


  • Call your insurance agent and ask about flood insurance.
  • Add it to your policy if you live in a flood-risk area.


What You Shouldn’t Do:


  • Don’t wait until your property is underwater to figure out your coverage. By then, it’s too late.


7. Contact Insurance Immediately If Damage Happens

Contact Insurance Immediately If Damage Happens

If water damage ever happens, don’t wait around. Call your insurance company right away. The faster you act, the better.


What You Should Do:


  • File a claim as soon as you notice the damage.
  • Follow the steps your insurance company gives you to protect your property.


What You Shouldn’t Do:


  • Don’t delay reporting the damage. Waiting even a day or two can complicate things.


8. Act Fast to Reduce Damage

Act Fast to Reduce Damage

Water damage spreads faster than you’d think. The longer you leave it, the worse it gets.


What You Should Do:


  • Shut off the water at the source, if possible.
  • Remove furniture, electronics, and other items from the wet area to prevent more damage.


What You Shouldn’t Do:


  • Don’t let water sit. Sitting water leads to mold—and trust us, you don’t want that.


9. Water Extraction is Essential

Water Extraction is Essential

Standing water isn’t just a mess—it’s a danger to your building’s structure. You’ll need professionals to get rid of it properly.


What You Should Do:


What You Shouldn’t Do:


  • Don’t try to handle all the cleanup by yourself. It’s risky, and you might miss hidden water that can cause more damage later.


10. Materials Need Different Cleaning Methods

Materials Need Different Cleaning Methods

Not all materials can be saved. Hard surfaces like concrete can often be cleaned, but soft materials like ceiling tiles may need to be replaced.


Material Action Needed
Concrete, Tile Clean and dry
Ceiling Tiles Replace completely
Drywall Replace if soaked
Insulation Replace when wet

What to Do:


What Not to Do:


  • Don’t assume everything is salvageable.


11. Mold Can Grow After Water Damage

Mold Can Grow After Water Damage

Even if the water is gone, moisture can stay in walls and floors. Mold can start growing within 24-48 hours.


What to Do:


What Not to Do:


  • Don’t ignore musty smells. It’s a sign of mold.


12. Know Who to Call for Help

Know Who to Call for Help

Sometimes, handling water damage on your own isn’t safe. Restoration experts can save your property and reduce long-term damage.


What to Do:


What Not to Do:


  • Don’t wait to get professional help.


You must read this write-up to learn all about Water Damage Restoration mistakes.

Wrapping Up

Commercial water damage is serious, but with the right steps, you can prevent and handle it. Keep your building in top shape, check your insurance, and don’t hesitate to call professionals when needed. If you’re ever unsure, reach out to water restoration experts for guidance. Take action now to protect your business.

Posted on: March 24, 2025

White Mold vs Black Mold: What You Need to Know

Mold in the house? It’s more common than you think. Maybe you’ve noticed strange spots on your walls, furniture, or even your plants. It could be white mold or black mold. Both are different, and knowing the difference between white mold vs black mold matters.


White mold is less dangerous but still needs attention. Black mold, on the other hand, can harm your health if ignored. Don’t panic! We’ll explain everything step by step. You’ll learn how to spot them, the risks involved, and how to deal with them.


Let’s get started so you can keep your home safe and mold-free!

What is Mold?

What is Mold

Mold is a kind of fungus. It spreads by sending out tiny spores into the air. These spores land on surfaces and start growing if the conditions are right. You’ll often find mold on things like wood, drywall, carpets, or even furniture. 


Different types of mold can grow indoors, such as:


  • Aspergillus


  • Cladosporium


  • Penicillium


  • Stachybotrys chartarum, which is also called black mold.


The EPA says mold spores are always in the air, both inside and outside. When they land on wet spots, they start to grow to survive. So, it usually shows up in places where there’s a water leak, high humidity, or bad ventilation.

White Mold vs. Black Mold: Quick Comparison

White Mold vs. Black Mold

Feature White Mold Black Mold
Color White, light gray, or powdery Black or dark green
Texture Fluffy or powdery Slimy or fuzzy
Where It Grows Basements, crawl spaces, wood, ceilings Bathrooms, basements, wet walls, leaks
Health Risk Can cause allergies & breathing issues More toxic, can cause lung infections & nerve damage
Toxicity Low High
Removal Easier to clean Harder to remove, penetrates deep

White Mold: What You Need to Know

White Mold

White mold is a type of fungus. It looks thin and powdery, almost like a layer of dust. Most of the time, it’s white, but sometimes it might look gray or a little green.


It basically likes damp, wet places. 


You can usually find it in spots like:


  • Basements


  • Crawl spaces


  • Bathrooms


  • Attics


  • Wooden furniture


  • Walls or ceilings with leaks


If there’s a place in your home that’s humid or has poor airflow, white mold might start growing there. It keeps spreading if it has a steady food source. It eats cellulose, which is made up of starch and sugar. 


These are found in most wood products, so things like wood floors, beams, furniture, decks, and ceilings are very likely to get white mold.


Is White Mold Dangerous?

White mold isn’t as dangerous as black mold, but it’s not harmless, either. It can still cause problems for your health, especially if you breathe it in. 


It might make you:


  • Sneeze or get a runny nose
  • Feel dizzy or get headaches
  • Have itchy eyes or skin
  • Struggle with asthma symptoms if you already have asthma


If someone in the house has asthma or a weak immune system, you need to be extra cautious around white mold.


How to Get Rid of White Mold

Here’s how you can deal with white mold step by step:


  1. Ventilate the Area – Open the windows, turn on fans, or use a dehumidifier to dry the space. Mold can’t grow without moisture.


  1. Wear Protective Gear – Always wear gloves and a mask so you don’t touch or breathe in the mold.


  1. Clean Small Areas – For small mold spots, mix vinegar or baking soda with water. Scrub the mold gently until it’s gone.


  1. Call a Professional – If the mold has spread a lot or it’s in a big area, don’t try to handle it alone. Professionals have the right tools and safety gear to remove it completely.

Black Mold: The More Dangerous Type

Black Mold

Black mold, also called Stachybotrys chartarum, is one of the most dangerous types of mold. It’s toxic and grows in places that are damp and humid. It looks slimy and is usually dark green or black in color.


The Centers for Disease Control and Prevention (CDC) explains that black mold grows on wet or damp materials. It loves to grow on things made from cellulose (a type of plant material). These include:


  • Drywall
  • Carpet
  • Fiberboard
  • Wood
  • Wallpaper


It’s most common in places with water damage, leaks, or flooding. If an area stays wet for a long time, black mold can start growing there.


Is Black Mold Dangerous?

Yes, black mold is more harmful than white mold. It can cause serious health conditions, such as:


  • Severe allergies (sneezing, runny nose, itchy eyes)
  • Lung infections (according to the CDC)
  • Headaches and fatigue
  • Memory loss or difficulty focusing
  • Mood swings
  • Trouble breathing (wheezing, coughing, shortness of breath)
  • Nerve problems


If you find black mold in your home, don’t ignore it. It can get worse and make people very sick, especially children, elderly people, or anyone with asthma or a weak immune system.


How to Get Rid of Black Mold

Here’s what you need to do:


  1. Don’t Touch It Without Gear – Black mold is toxic, so wear gloves, a mask, and protective clothing before going near it.


  1. Stop the Moisture – Fix any leaks, dry out the area, and improve airflow with fans or a dehumidifier. Mold won’t grow if the area is dry.


  1. Call a Professional – Black mold is not something you should handle on your own, especially if it’s spread over a large area. Experts have the right tools and training to remove it safely.


  1. Throw Out Damaged Items – If the mold has soaked into things like carpets or drywall, you might need to throw those items away. It’s hard to clean them completely once mold has spread inside.

Why Mold Grows & How to Prevent It

Why Mold Grows & How to Prevent It

Mold needs three things to grow:


  1. Moisture – From leaks, condensation, or high humidity.


  1. Organic Material – Wood, drywall, fabric, or dust.


  1. Poor Airflow – Trapped humidity leads to mold growth.


How to Prevent Mold Growth?


  • Fix leaks as soon as possible
  • Keep humidity below 50% (use a dehumidifier)
  • Increase ventilation (open windows, use exhaust fans)
  • Clean damp areas regularly
  • Use mold-resistant paint on walls
  • Store items in dry areas

Mold Remediation: When to Call a Professional

Mold Remediation

Mold spreads fast. If left untreated, it can damage your home and health. If mold covers more than 10 square feet, you need a professional.


A mold removal expert can:


  • Find hidden mold
  • Use safe chemicals to remove it
  • Prevent future mold growth
  • Check for structural damage


At SOS Restoration, we help remove mold and fix water damage. Our team uses the best tools to get rid of mold and stop it from coming back.


We’re here 24/7 for any emergencies. Our prices are affordable, and we make sure you’re happy with the work.


Just call us, and we’ll handle everything!

Wrapping Up

Hopefully, we’ve been able to give you a complete comparison between white mold vs black mold. White mold is easier to remove but can still cause allergies and damage your home. On the other hand, black mold is more toxic and requires professional removal.


If you spot mold in your home, act fast! Fix moisture problems and call a mold expert if needed. Your health and home depend on it.

Do you have mold in your home? 

Don’t wait! Contact a mold specialist today.


FAQs

  • How can I tell if it’s white mold or efflorescence?
    White mold is often confused with efflorescence, which is a harmless salt deposit. Here’s how you can test it:
    • Touch It: Efflorescence turns into powder, mold does not.
    • Use Water: Efflorescence dissolves in water, mold does not.
    • Look at the Surface: Efflorescence grows on brick or concrete, while mold grows on wood. 

      If you’re unsure, it’s best to get a mold test.

  • How to test black and white mold? 

    You can test black or white mold using a DIY mold kit, which includes a swab or scraper to collect samples. You can also hire a professional to take samples and test the air for mold. Look for visible mold, musty smells, or moisture to identify mold growth.

  • Why is White Mold White? 

    White mold looks white because its spores don’t have color. Unlike black mold, which has colored spores, white mold spores lack the pigments for darker colors. These spores grow on thread-like parts called hyphae, which make the mold look white by reflecting light. Some molds start white and change color later, but many white molds stay white all their life.

  • Is white mold cancerous?

    No, white mold is not connected to cancer. It can cause health conditions like allergies and asthma, especially in sensitive people. However, it is not known to cause cancer.
Posted on: March 24, 2025

What is Blackwater? Why It’s a Serious Health Risk

Let’s say you walk into your basement after heavy rain, and there’s dirty, foul-smelling water everywhere. It’s not just rainwater. It’s contaminated and mixed with sewage and bacteria. This is blackwater.


You might think, “It’s just water, I can clean it up.” But wait—blackwater isn’t normal water. It’s full of harmful bacteria, viruses, and toxic waste that can make you seriously sick. If you don’t handle it the right way, it can spread diseases, ruin your home, and cause long-term health problems.


So, what is blackwater? Why is it so dangerous? And what should you do if you’re dealing with it? Let’s break it down here so you know how to stay safe and act fast.

What is Blackwater? How is it Different from Greywater and Clean Water?

What is Blackwater

Not all water is bad water. When there’s a leak or a flood in your home, the type of water makes a huge difference. Some water is safe, while others can be very dangerous.


Blackwater, also called Category 3 water, is highly contaminated water. Here’s why Blackwater spills or Cat 3 Water Damage happen:


  1. Sewage backups – Toilets overflow, sewer pipes break


  1. Flooding – Storms, hurricanes bring contaminated water


  1. Plumbing failures – Burst pipes carry waste


  1. Septic system overflows – Poor maintenance causes leaks


Blackwater vs. Greywater vs. Clean Water


Type of Water Category Source Danger Level
Clean Water Cat 1 Rainwater, tap water leaks Safe (No contaminants)
Greywater Cat 2 Sinks, showers, washing machines Low risk (Some dirt and soap)
Blackwater Cat 3 Toilets, sewage backups, floodwater Very dangerous (Bacteria, viruses, and chemicals)


Data on Blackwater Contamination


  1. A significant percentage of floodwater samples contain harmful bacteria. (Source: CDC)


  1. Mold starts growing within 48 hours of blackwater exposure. (EPA research)


  1. A high chance for people exposed to blackwater to develop infections. (Health studies)


How Quickly Blackwater Spreads Risks


Time After Contamination Risk Level
0-24 hours Bacteria starts growing
24-48 hours Mold begins to spread
48+ hours Airborne diseases, structure damage

Why is Blackwater a Serious Health Risk?

Blackwater is not just dirty—it’s dangerous. It can cause infections, diseases, and breathing problems. It carries germs, chemicals, and toxic waste that can make people very sick. If blackwater enters your home, it’s a serious health risk. You shouldn’t touch it or try to clean it yourself.


Let’s break down in detail why blackwater is so harmful.


1. Blackwater Spreads Bacteria & Viruses

Blackwater Spreads Bacteria & Viruses

Blackwater is full of bacteria, viruses, and parasites. When you come into contact with it, these germs can cause serious infections.


The Most Dangerous Germs in Blackwater:


  1. E. coli – Causes stomach pain, vomiting, and diarrhea.


  1. Hepatitis A – A virus that damages the liver and spreads through contaminated water.


  1. Salmonella – Causes food poisoning symptoms like fever and diarrhea.


  1. Norovirus – Known as the “stomach flu,” it spreads fast and causes severe vomiting and diarrhea.


What Happens If You’re Exposed to Blackwater?


  • If blackwater touches your skin, it can cause rashes or infections.


  • If you breathe in contaminated air, you might get lung infections or breathing problems.


  • If blackwater gets into your drinking water, it can cause severe food poisoning and dehydration.


This is why you should never handle blackwater without professional help!


2. Blackwater Contains Toxic Chemicals & Waste

Blackwater Contains Toxic Chemicals & Waste

Blackwater isn’t just filled with germs—it also has toxic chemicals from sewage, floodwater, and industrial waste.


What’s in Blackwater That’s So Dangerous?


  • Pesticides – Can damage the nervous system and cause poisoning.


  • Heavy Metals (Lead, Mercury, Arsenic) – Can cause brain and kidney damage.


  • Industrial Waste – May contain cancer-causing chemicals.


  • Household Chemicals – Cleaning products, bleach, and detergents that can burn skin and damage lungs.


How Can These Chemicals Affect You?


  • Nerve Damage – Some chemicals in blackwater affect brain function and coordination.


  • Liver & Kidney Damage – Toxic waste forces your body to work harder to remove poisons.


  • Poisoning – Some contaminants can be fatal if swallowed.


This is why blackwater is classified as “Category 3 Water Damage“—the most dangerous type!


3. Blackwater Produces Foul Odors & Airborne Contaminants

Produces Foul Odors

If you’ve ever smelled sewage or rotten eggs, you know how bad blackwater stinks. But the smell isn’t just unpleasant—it’s a sign that the air is filled with harmful gases and mold spores.


What’s Floating in the Air When Blackwater is Present?


  • Bacteria & Mold Spores – These can get into your lungs and cause infections.


  • Hydrogen Sulfide Gas – This toxic gas smells like rotten eggs and can cause nausea and dizziness.


  • Methane Gas – Odorless but highly flammable and dangerous in large amounts.


What Happens If You Breathe in Contaminated Air?


  • Lung Infections – Bacteria and mold spores cause pneumonia-like symptoms.


  • Severe Allergies – Sneezing, itchy eyes, and difficulty breathing.


  • Asthma Attacks – People with asthma are at higher risk of serious breathing problems.


If you ever smell a strong sewage odor, leave the area immediately!


4. Blackwater Leads to Mold Growth (in Just 24-48 Hours!)

Blackwater Leads to Mold Growth


Mold loves moisture. If blackwater soaks into your walls, floors, or carpets, mold will start growing fast. Within one to two days, you could have a serious mold problem.


How Does Mold from Blackwater Affect Your Health?


  • Breathing Problems – Mold spores can trigger coughing, wheezing, and lung infections.


  • Skin Allergies – Some people develop rashes or itching.


  • Weakened Immune System – Mold exposure makes it harder for your body to fight infections.


How Does Mold Damage Your Home?


  • Destroys Walls & Ceilings – Mold eats away wood, drywall, and carpets.


  • Weakens Your Home’s Structure – If left untreated, mold can cause serious damage over time.


  • Spreads Quickly – Mold spores travel through the air, affecting other parts of your home.


Mold from blackwater is extremely dangerous. Professionals must remove it!

How to Handle Blackwater Contamination

How to Handle Blackwater Contamination

What NOT to Do


Never touch blackwater because it is full of bacteria and harmful germs. Do not try to clean it yourself, as it requires professional equipment and treatment. Also, never ignore the smell—a strong sewage odor means dangerous bacteria and gases are in the air, which can cause health problems.


What to Do Immediately


If you face blackwater contamination, first evacuate the area to keep yourself, your family, and pets safe. Then, call the water damage restoration company because Category 3 water (Cat 3 water) is too dangerous to handle without proper tools. 


If you must be near the affected area, wear protective gear like gloves, masks, and boots to avoid direct contact. Once the professionals arrive, they will use strong disinfectants like bleach to kill bacteria and make the area safe again.


If you need help with water damage, SOS Restoration is here for you.


We stop the damage from getting worse and then fix everything. We fix leaks, remove the water, and restore your home fast. We also handle mold and bacteria and repair things like walls and floors.


We’re available 24/7 and can even help with your insurance!

How to Prevent Blackwater Damage

The best way to avoid blackwater damage is through regular plumbing maintenance—fix leaks, check pipes, and make sure your drains work properly. If you use a septic system, pump it out regularly to prevent overflows. 


Installing backflow prevention devices can stop sewage from backing up into your home. If you live in a flood-prone area, flood-proofing your home with sump pumps and proper drainage can help keep contaminated water out.


Are you interested in learning how to get insurance to pay for water damage? Then, you can visit this insightful write-up.

Wrapping Up

Hopefully, you now have a pretty good idea of what blackwater is. It’s a big problem because it can make you sick and cause serious damage to your home. If you have blackwater damage, don’t try to clean it yourself—call the professionals right away. 


Always take blackwater seriously—it’s not just dirty, it’s dangerous. Stay safe, act fast, and protect your home!


FAQs

  • What is the difference between blackwater and greywater?

    Greywater is used water from sinks and showers. It may be dirty, but it’s not extremely harmful. Blackwater, on the other hand, comes from toilets and sewage. It’s full of bacteria, viruses, and waste that can make you sick.Greywater is safer and can sometimes be reused (for watering plants). Blackwater is highly toxic and must be removed immediately by professionals.

  • Can blackwater damage be cleaned without professionals?

    No, cleaning blackwater requires special tools and training. It’s too dangerous to handle without expert help.

  • Is blackwater always caused by flooding?

    No, blackwater can also come from sewage backups, burst pipes, or septic system failures. Flooding is just one of the many causes.